 In a previous blog we discussed how to improve the hatchability of an egg before it begins to incubate. In this second part, we will discuss how to improve your chances of having the egg hatch after it arrives in the incubator.
Your stored eggs should have been resting in a cool, dry spot. I actually tip the egg carton in which I am storing the eggs each day . I remove the eggs from the cool area about 6 hours before I place them in the incubator so that they can gradually warm up to room temperature. If you put cool eggs into a warm incubator, the eggs will sweat and condense water.
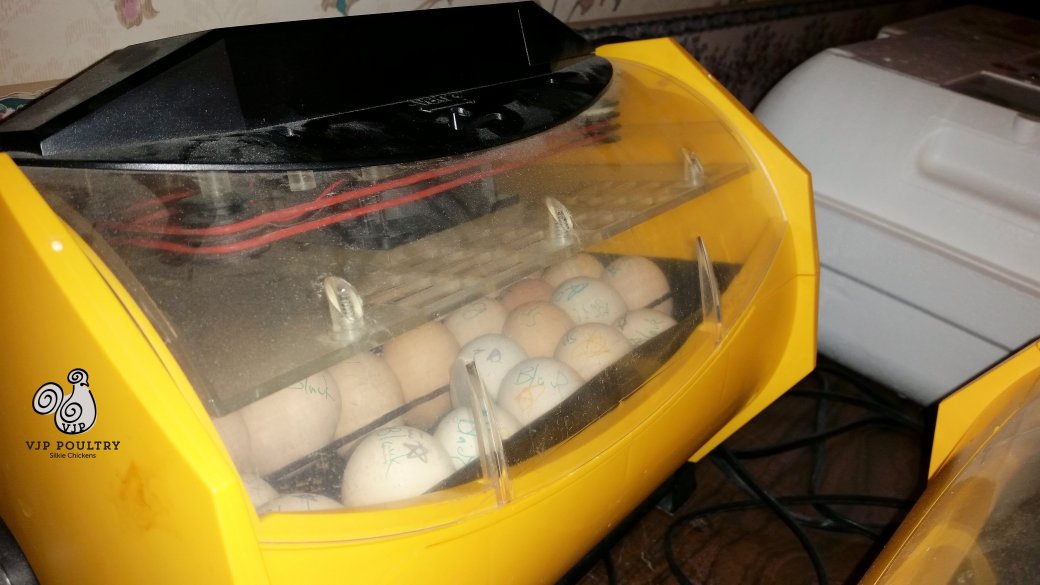
Your incubator should have been turned on 24 hours prior to your putting eggs in it. I have thermometers to test the temperature before and later after I put the eggs in. Still air incubators are set a a slightly higher temp than circulated air incubators. I have circulated air and I keep the temp at 99.5 degrees. Check the temp at different spots in the incubator. You may find temperature differences at the corners and sides and also in the middle. I keep water in the troughs at the bottom of the incubator. Sometimes I will weigh and record the weight of each egg in grams using a scale. I then weigh the eggs again at 7 days, 14 days and 18 days. If your humidity is correct you should note a drop of around 2 grams at each weighing. If they are not losing enough weight then your humidity is too high. If they are losing too much weight, then you will need to increase the humidity in your incubator.
Try to fill the entire incubator with eggs. The heat will be more evenly distributed that way. Make sure that the automatic turners are working and moving. If you are self turning the eggs, I set a timer on my phone to remind myself to turn the eggs every four hours.
I candle my eggs at day 7 and remove all of the eggs that don’t show veining or that have a single blood ring around the middle of the egg. These eggs will not hatch. I use a small, strong LED flashlight to candle.
I use one incubator for incubating the first 17 days and another as a hatcher for days 18-21. When I switch to the hatcher, I mark where the air cell is and make an X where the air cell dips the lowest in the egg. When I put them on their sides, I make sure that the X is showing on top of the egg. That is where the chick will probably make its external pip. I make sure that the eggs are spaced out and not touching if I can help it. I like the fat end facing me so that I can see pipping progress easier. I also like to leave a space where I can add water when I need to without disturbing the eggs. They need two days on their sides so that they can get into position for pipping and zipping.
I use Brinsea octagons for hatching. Brinsea is no longer making that model. Their new Brinsea incubator is the Ovation 28 Eco. I keep track of what my fertility rate is and what my hatching rate is. I also open up any unhatched eggs to see what went wrong and try to improve next time.
I hope these suggestions were useful to you. What works for one person may not work for another. The climate you live in will also effect the humidity and the ability for your eggs to hatch. Good luck on all your future hatches from VJP Poultry!
For tips and tricks for raising outstanding silkies check out our Chicken Learning Center at VJPPoultry.com . VJP Poultry is an NPIP and state inspected hatchery located 30 miles north of St. Paul. We hatch out silkies all year long so we always have stock available. Like us on Facebook to get weekly updates on what we currently have for sale.
Victoria J. Peterson

