Strengthen Your Chicken’s Egg Shells With the Shell of an Oyster

20180515_123422-1Hens work hard to provide us with their daily eggs.  Making egg shells takes a lot of calcium.  The more eggs they lay, the more calcium they need.  If a hen doesn’t get enough in her diet, her body will steal calcium from her bones to make the egg shell.  This leaves her bones very brittle. You may think of Osteoporosis which women sometimes get as they age.  Hens often have that same problem.

The egg shell that a hen lays is 95% calcium by weight.  In one year the amount of calcium put into her shells can equal 20 times the amount of calcium that is contained in her bones. In order to stay healthy  and create strong egg shells, she needs to consume a large amount of calcium in steady intervals.

The most recognizable sign of calcium deficiency is thin shelled eggs or even eggs laid without a shell .  Lack of calcium in the diet can also lead to soft  shell eggs which look rubbery.  This can also lead to egg binding which can be fatal in hens.  Rough spots and wrinkles on the shells are another sign of low calcium.  The egg shells should look hard and smooth.

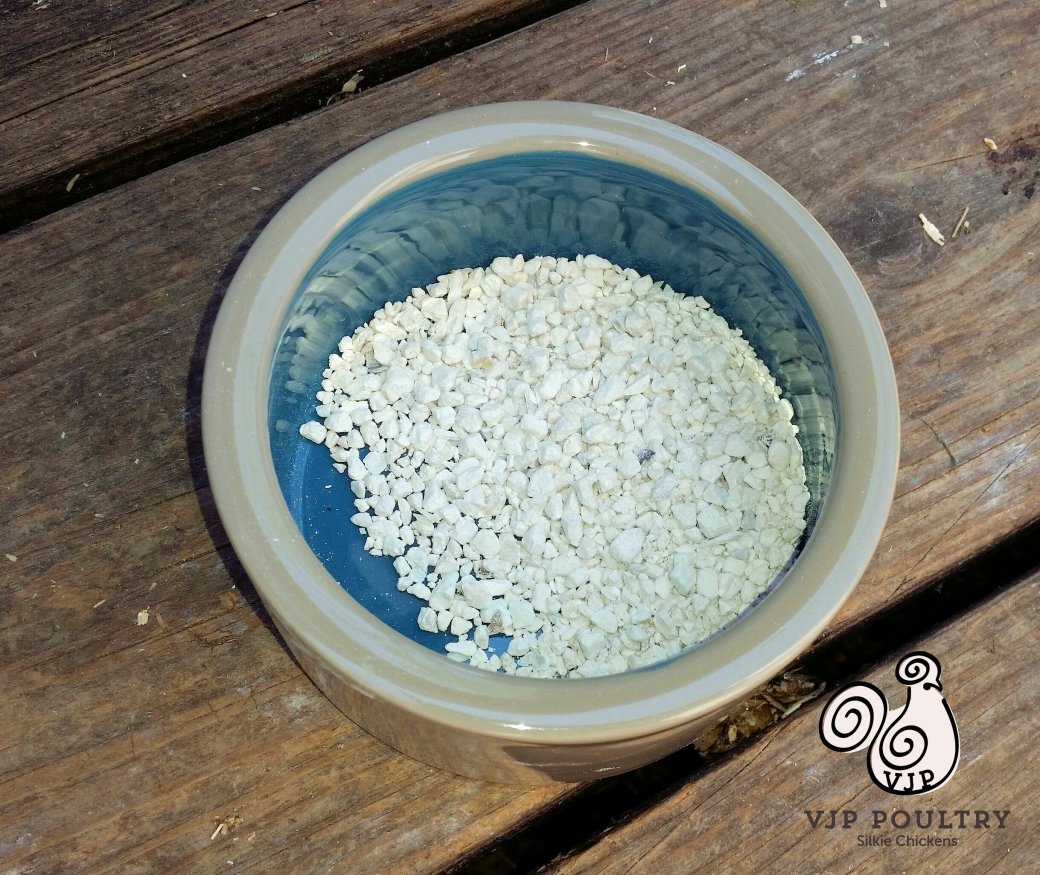
Ground oyster shell is the most common supplement to increase the amount of calcium in a hen’s diet. Oyster shell is inexpensive and lasts a long time. It does not spoil or go bad. Oyster shell is eaten by hens and the shell dissolves in the gut.  It is not the same thing as grit.  Grit aids digestion by grinding up food in the crop.  Oyster shell has nothing to do with digestion.  It also does not stimulate egg laying. It simply provides the mineral calcium to the hen.

To lay well, a hen needs 16% crude protein .  Most grains range 7-12% protein and are low in certain essential amino acids.  High amounts of protein can contribute to more frequent ovulation in a hen. Make sure that you are giving your hens a balanced feed with the correct nutrients and protein. Most of their food should come from a nutritionally balanced food. If you give them treats or let them free range you can be upsetting this balance.

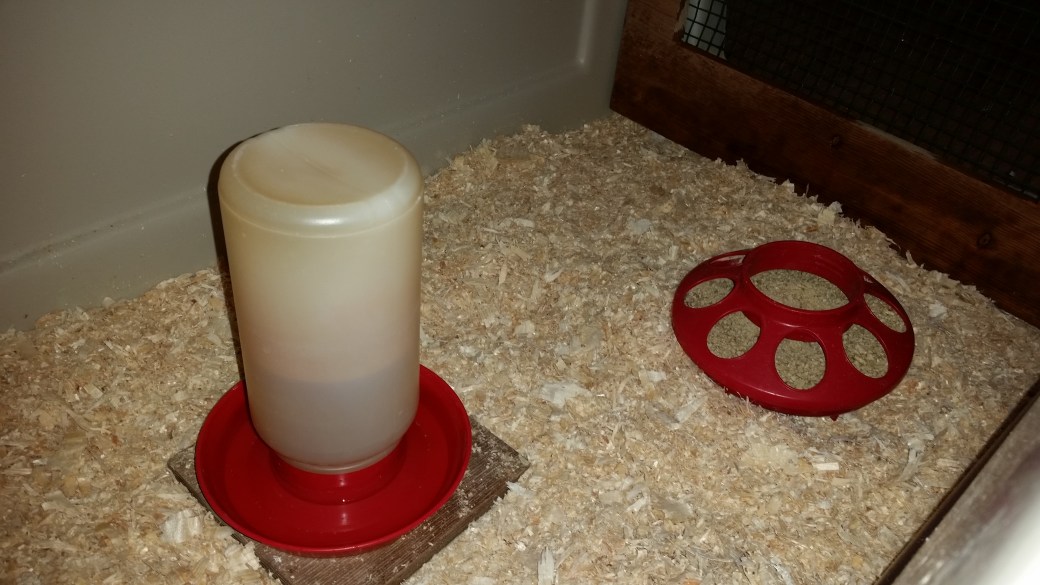
Most hens start to lay at about 20 weeks.  Wait until the hen has actually laid an egg to begin giving them oyster shell supplement.  Giving it too early can damage the young pullet’s kidneys. Oyster shell should be given free choice in a separate bowl so they can eat as much as their body needs.  Laying hens who aren’t getting enough calcium can produce weak or irregularly shaped eggs.  This issue can also cause slow laying or even problems like egg eating because they are so desperate for the calcium they need.

How much calcium a hen needs is an individual issue and all hens are different. Some breeds lay eggs every single day. Other breeds take more time off, such as silkies.  The hen’s bodies will prompt them to eat the oyster shell as they need it. If you don’t see them eating it, they may not need it

Do not mix the oyster shell into the food.  This can force them to eat too much calcium which can damage their kidneys.  Feed it to them in a separate bowl or even scatter it on the ground.  Some commercial feeds contain calcium, but it is often not enough for typical layers, especially if they have access to table scrapes and treats.

In order for the hen to be able to absorb the calcium, two  nutrients seem to affect it the most. These nutrients are Phosphorus and vitamin D3.  Phosphorus is easily found in grains. D3 come from sunshine so you want to make sure that your hens have exposure to sunlight.  Powdered vitamins added to the water will help with this.

I have found oyster shell to come in many different sizes.  Some pieces are so large they can barely swallow it,  down to basically nothing but powder. The ideal particles size of supplemental calcium ranges between 2 mm and 5 mm.  Larger pieces of calcium carbonate take longer to digest than smaller particles and are more desirable.  Hens seek out large particles of oyster shell late in the day before the period of shell formation occurs.  Shell formation usually occurs during the night.  Too much calcium will give the eggs an extra coating of powdery calcium around the entire egg or you will see calcium deposits around the shell.

Hens do best when fed a balanced crumble or pelleted diet, especially an all-flock diet with oyster shell in a separate bowl on the side.  Meat birds should be given a separate feed.  Birds that eat other things besides their layer food such as free range foragers or birds that get extra treats need the extra calcium from oyster shell.

Oyster shell is not for pullets that haven’t started laying eggs yet. Wait until they actually start laying eggs to give them the extra calcium.  Chickens who are not laying will get enough calcium in their daily feed for normal calcium use.  When they are laying they need four times as much calcium as a non laying hen.  Giving additional calcium to chickens who are not layers is detrimental to their health. This would include roosters, cockerels,  and older hens no longer laying.

Oyster shell should never be mixed with the food.  Just leave it out in a separate bowl.  They will instinctively know to take it when they need it.  Do make it available all year round.  If they aren’t laying as much in the winter, they will just lower their intake of it.

There are other forms of calcium you can use. Limestone is a rock that contains calcium. If you live in an area with limestone gravel they may naturally pick some up.  Some people save egg shells and offer these back to the hens.  Remember that a hen’s own shells will not provide enough calcium if she doesn’t have other supplements.  Bake the shells first in a 350 degree oven for 10 minutes to kill any bacteria that may be present.  Crush them finely so that they do not look like egg shell, otherwise you are teaching the hens to eat their own eggs.

For tips and tricks for raising outstanding silkies check out our Chicken Learning Center at VJPPoultry.com .  VJP Poultry is an NPIP and state inspected hatchery located 30 miles north of St. Paul.  We hatch out silkies all year long so we always have stock available.  Like us on Facebook to get weekly updates on what we currently have for sale.

Victoria J. Peterson

20180517_091554-1


Why Your Chicken Needs a Dust Bath

20180323_145950-1   All chickens should have access to dust baths.  It doesn’t matter what breed or age of chicken, it is instinctual for them to wallow in the dust and dirt.  It is their way of getting clean and practicing good hygiene.

When you first witness this dust bathing, you may think that something is wrong with your bird.  It almost looks like they are in trouble or having a seizure.  They are lying on their sides with one leg sticking out and the other scraping dirt and dust in kind of a circular motion.  The wings are throwing dirt up into the air so that it falls back down on top of them.  It looks scary , but it is perfectly normal.

Chickens will create a dust bath area all by themselves.  A chicken scratches and digs out a bowl shaped depression in the dirt or will even use the shavings inside of the coop.  The chicken settles into this hollow, fluffs up its feathers and then scratches up the dirt.

It might look like they are making a nest to lay eggs because it is round in shape but these are preparations for dust bathing.  Chickens use their feet and wings to get loose dirt throughout their skin and feathers.  Once they are completely covered in a layer of dirt, the bird will fluff and shake off the substance to evenly distribute it on their bodies.

A chicken’s dust bath helps to remove excess oil, as well as parasites such as lice, mites and ticks.  Dust bathing is an important part of keeping chickens healthy and clean.  It is important that your chicken has access to areas where dust bathing can take place. Most will look for a sunny spot with loose dirt.  Even if they never get to free range, you can set up a dust bath in their coop or pen.

There are four main behaviors when dust bathing: vertical wing-shaking, head rubbing, bill raking and scratching with one leg.  The hen scratches with her feet and beak at the ground.  She then erects her feathers and lies down. They create deep bowls as they wiggle and squirm to get dirt deep under their feathers.  They make happy noises while flipping dirt all over themselves.  The dust collects between the feathers and then is shaken off.  This helps to give the feathers good insulating abilities.

Chickens clean their feathers and skin by preening with their beaks and using an oil gland at the base of their tail. After a dust bath a hen will spend time primping and pecking at their feathers. This helps to smooth their feathers and removes sheaths on new feathers.  Feather maintenance is very important.  Birds of all kinds take dust baths and certain mammals do as well to keep clean and remove parasites.

Most dust bathing occurs in the middle of the day. Warm temperatures increase dust bathing behavior. Hens will tend to dust bath if they see other hens doing it.  It ends up being a very social activity.  It is not just hens that will dust bath, but roosters enjoy doing it as well.

The need for a dust bath is ingrained in their behavior.  They will dig holes if you don’t provide them with a spot.  Free ranging birds will find a place in your garden if you let them.   Battery hens in cages will sham dust bathe.  They will go through the motions of dust bathing even if there is no other material in their cages.

Here at VJP Poultry, we decided it was time to create some dust bathing areas inside of our runs.  We used treated 1″ X 4″ lumber and made 18″ X 24″ boxes with no bottom.  We set them in the run and filled them half full with play sand.

There are other things that you can use to create your dust bathing areas. Any large shallow pan such as a kitty litter pan or small kiddie pools.   Fill it with a variety of substrates.  Some examples would be :  Fine sand, dry dirt,  or peat moss.

Some people like to add food grade diatomaceous Earth or DE.  The sharp edges pierce the soft body parts of parasites and kills them.  Be careful with DE as it can be very harmful if inhaled and can damage lungs.  Use a small amount as part of your substrate.

Firepit ash or ash from a wood stove is another product that can be used. Birds can absorb magnesium, calcium and vitamin K from the ash.  Use ash from hardwood trees and make sure that if you remove it from your own fire pit that there isn’t any additional chemicals such as in treated lumber.

Dried herbs are natural pest repellents.  They can get rid of mosquitoes, flies and ants as well as parasites such as mites, lice and ticks.  They provide calming aroma therapy and have antibacterial properties to heal minor scratches and wounds.  Add them to the substrate as well.

You can also purchase ready made dust bath products.  It is easy to add to what ever other products you want in your dust bath mix.

Remember that you will need to periodically clean out your dust bath area.  I pick out the big chunks daily and give it a good raking.  A cover or a beach umbrella will help to keep out the rain.  You want your dust bath to stay as dry as possible.  One of those turtle sand boxes with a cover or any sandbox with a cover can make a great dusting area.  If possible, move your dusting area inside in the winter to prevent the substrate from freezing.

For tips and tricks for raising outstanding silkies check out our Chicken Learning Center at VJPPoultry.com .  VJP Poultry is an NPIP and state inspected hatchery located 30 miles north of St. Paul.  We hatch out silkies all year long so we always have stock available.  Like us on Facebook to get weekly updates on what we currently have for sale.

Victoria J. Peterson

20180322_144429

Silkies For Sale – 3/6/18

The Perfect Chick Brooder

20180301_154220
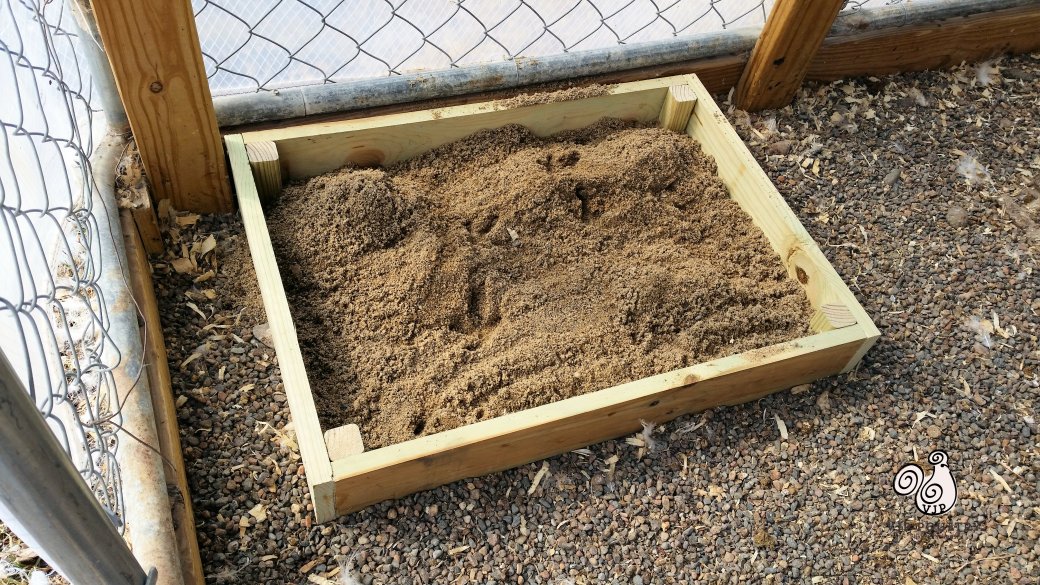
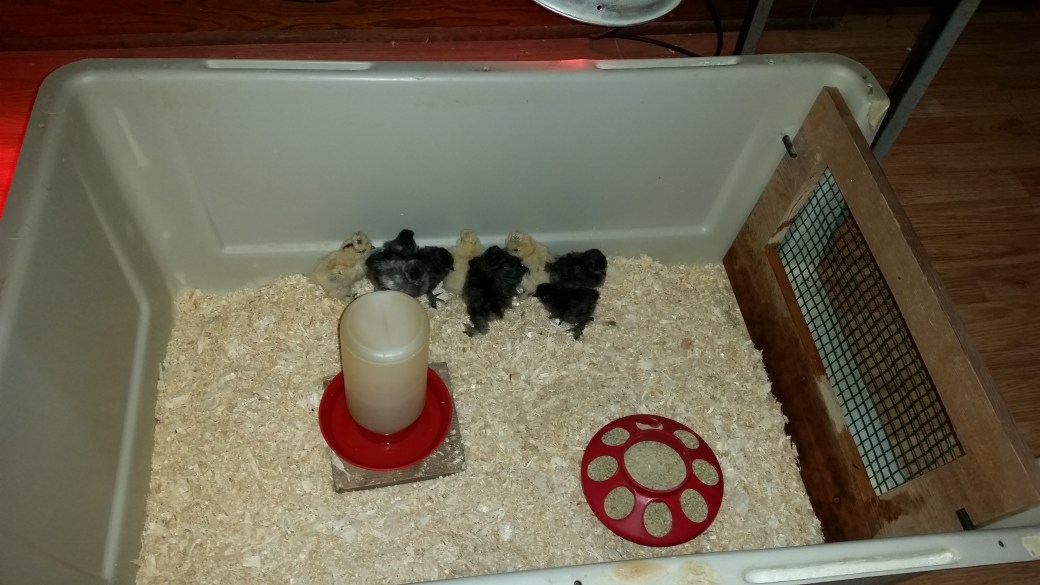
A brood is a group of chicks that are hatched or cared for at one time such as a hen with her brood of chicks.  A brooder is a place where a young chick can be kept safe and warm.  It takes the place of the mother hen but still can provide warmth and protection.  Even if you always use a broody hen for your hatches, it is good idea to have one available for emergencies.
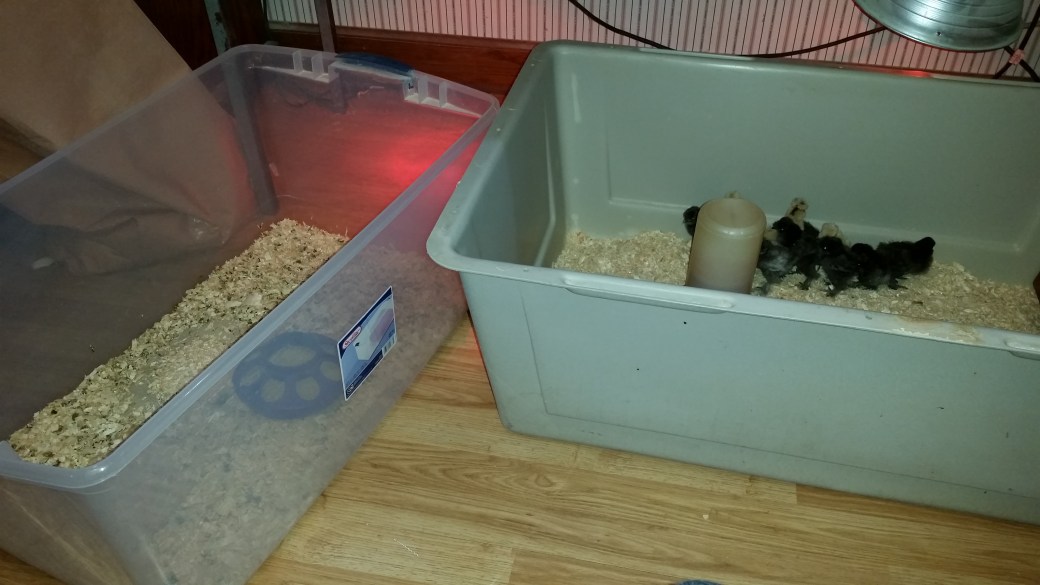
This article is going to concentrate on the brooder box itself.  The box is an important starting point. The dishes, food, bedding and heat lamp are all added after the box is chosen.  There is an abundance of options out there for brooders.

The basic brooder can be made out of many different kinds of materials such as plastic, metal, wood or cardboard. You can buy a ready made brooder or you can make one yourself out of a cardboard box or plastic tote.  I prefer plastic because it is easy to clean and you can use it for multiple hatches.  Cardboard falls apart when it gets wet and damp conditions are not healthy for the chicks. Heat lamp use with cardboard and pine shavings can be a fire hazard unless you are extremely careful with mounting the heat lamp.

There are some wonderful brooders available.   A brooder box  or a rabbit hutchcan make a very sturdy brooder.  Some people use a wading pool  or even a dog carrier.    Whatever works for you.  Your choice will have to do with what time of year it is and whether the chicks will be inside or outside.  If outside, you will need to protect both the brooder and the chicks from the elements.

Folding play pens also can make great brooders.  Remember that protection from the outside world is very important.  The sides should be high enough so that the chicks do not jump out and that other pets cannot get in.  Twelve inches high is a nice height.  You will also need some kind of a top.  I just place a window screen on top that can be easily removed and can allow for maximum ventilation.  A larger screen can be used with larger brooders.

The size of your brooder will depend on how many chicks you are brooding.   Newborns up to 4 weeks old need around 1/4 square foot per chick.  Five weeks and up will need around 1/2 square foot per chick.  Bantam breeds will not need as much space as they are smaller.  It is better to buy a larger brooder and then use dividers to make it smaller for newborns.  A smaller space allows for a warmer area for newborns.

There are several home brooder kits that allow you to change the size of your area.  Some brooders come with stands for the heat lamp and other kits have even more extra equipment included.

Chicks stay in their brooder until they are feathered out (have lost their baby down and now have actual feathers).  I brood mine until they are ready to move outside at about 10 weeks.  Ten week old birds will not fit into their baby chick brooders.  As your chicks grow, you will need to find larger brooders or set up a brooder situation inside of their outdoor coop.

If you plan on brooding chicks every year then I would suggest something that is going to last and is easy to clean.  I have had the most success with plastic tote brooders or brooders made from large plastic dog carriers.  I use the plastic totes for the newborns and the dog carriers for larger chicks.  The clean up very easily.  Ventilation is important but brooders should not be drafty especially for newborns. If you need advice about how to heat your brooder check out “How to choose a heat source for your Brooder“.   For information on taking care of newborn chicks check out “Silkie Chick Management20180301_154243“.

For tips and tricks for raising outstanding silkies check out our Chicken Learning Center at VJPPoultry.com .  VJP Poultry is an NPIP and state inspected hatchery located 30 miles north of St. Paul.  We hatch out silkies all year long so we always have stock available.  Like us on Facebook to get weekly updates on what we currently have for sale.

Victoria J. Peterson

20180301_154105

Silkies For Sale – 2/15/2018