How to Choose a Heat Source for your Brooder

20180309_092902A baby chick runs to the safety and warmth of its mother’s wings. Here it feels secure and loved. The mother hen’s body heat warms the little chick and when it is ready the chick will dart out into the world to find food and water.  When choosing a heat source for your brooder you will want something that can be as close as possible to a natural mother hen.

Chicks need supplemental heat.  Their little bodies will not keep themselves warm enough until they fully feather out.  Feathering out means that they completely lose their baby down and develop true feathers.  This can happen at different ages depending on your breed of chicken.  The larger the breed, the sooner they will no longer need a supplemental heat source.  Most breeds need it for about six weeks depending on the outside weather.  Brooding in the winter is different than brooding in the summer.  The temperature around your brooder will make a difference in how long you keep your chicks under the heat.

Chicks also need steady heat both day and night.  You will need a heat source that is dependable and allows for a typical  sleep cycle.   A steady white light on them 24/7 is not normal or natural.  A red infrared bulb is better for their sleeping patterns and is supposed to cut down on any pecking activity among the chicks.

The basic heat formula that most people use for baby chicks begins at 100 degrees Fahrenheit for newborns. This is what the temperature of the incubator was. You then subtract 5 degrees for each week of age after that. A one week old would be 95 degrees, a two week old would be 90 degrees and so on.  I find that formula way too warm and could lead to your little chicks pasting up on their fluffy behinds. In the world of the mother hen, the little ones would be exposed to cooler temps much sooner and I think that less heat is better than too much heat when it comes to brooders.  You need to make sure that the chicks are able to escape any temperature that is too warm.

20180308_161312-1

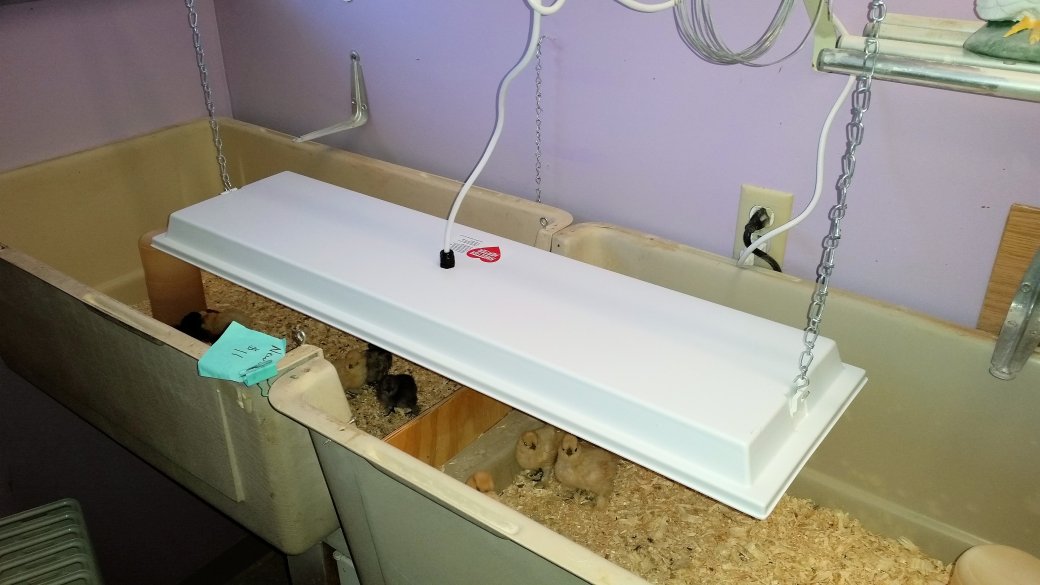
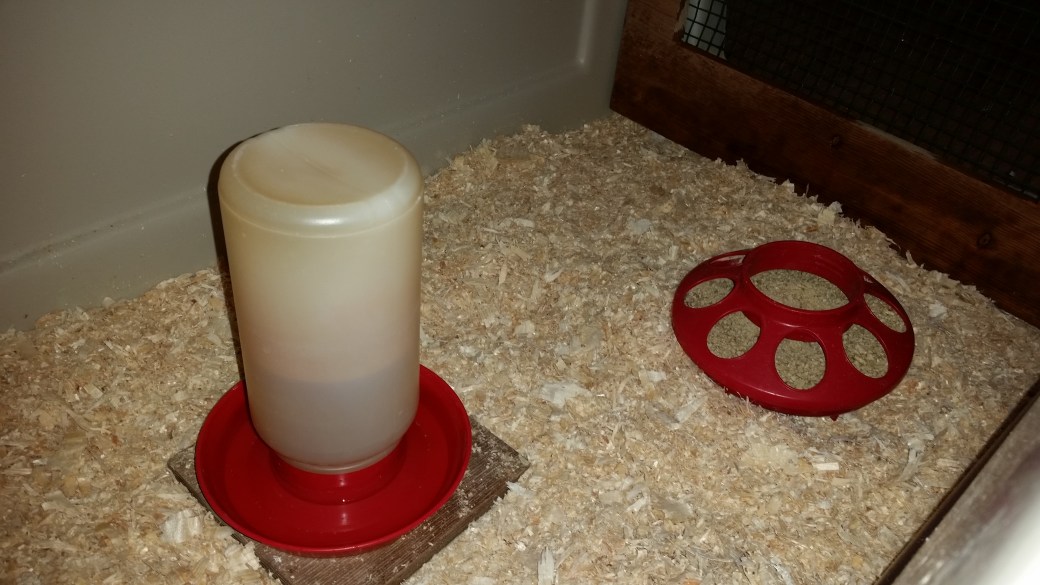
The most common way to brood chicks indoors is with a heat lamp fixture and a 250 watt heat lamp bulb.  It is the cheapest way to go and many people use it especially if they don’t brood chicks very often.  The pros for going this route is that you can purchase them at most places that sell chicken supplies.  You can hang them at any distance from the brooder.  However, many things can go wrong.  The biggest issue is that they can fall into the brooder and start a fire.  They must be hung very securely.  Do not rely on just the clamp.  Use zip ties and chain to secure it.  We always use a double system so if one cord fails the other cord will prevent it from falling. I will put a flat screen on top of my brooder as an additional measure to keep the heat lamp from falling into the brooder.  Make sure that your heat lamp fixture has a porcelain socket, not a plastic one that can melt.  The bulbs will have to be replaced. I have found that they also lose strength as they get older and do not put out as much heat.  Always have extra bulbs available in case your bulb burns out.  If they bulb burns out at night your chicks will become cold and begin to pile up on each other for warmth.  This will cause the ones on the bottom to suffocate.  Always start each season with a new bulb.  I have found a 250 watt heat lamp bulb too warm for small brooders. You can get infrared bulbs at lower wattage. Always dust your bulbs and hoods as dust buildup can cause a fire as well.  Reptile ceramic heat emitters  can also be used as a safer alternative to heat lamp bulbs.

There are also heat lamp holders  that are caged at the top to operate safer.

Radiant heat is another brooder heat choice.  Radiant heat passes through air without warming the air.  There are several products that rely on radiant heat.  Brinsea’s Ecoglow , Titan’s Electric Mama Hen andRentACoop’s heating plate all use less electricity than  a heat lamp bulb and mimic a mother hen.  They are for small batches of chicks but the Ecoglow 50 can warm up to 50 chicks.   The advantages of these are that there is no fire hazard , it uses less electricity (14 watts vs 250 watts) and there is no disruptive light.  It is more like a natural mother hen by creating a little cave to hide under.  You can adjust the height of them as the chicks grow.  You do not have to hang it up as it stands on legs.  You will have adventurous chicks jumping up on top of it and creating messes but it is easy to clean up.  These types of radiant heat brooder heat sources work best if the air around it is above 50 degrees. They are not effective in outdoor use if it is less than 50 degrees.  These products are not as warm as a heat lamp can be and will not heat the air around it.  I think that these are nice if you plan on doing a batch of chicks every year.  It may be expensive at first but it will pay for itself in lower electric costs.  There is nothing to replace on it so you do not need to worry about bulbs burning out.

A Sweeter Heater uses radiant heat as well. Instead of being a free standing unit, it is hung from above or as a side panel as in the cozy products panel.  Sweeter Heaters come in different sizes and are the best heaters for people who brood chicks frequently.  Hang it above on chains so that they are just above the chick’s height.  Raise it higher as the chicks grow taller.  Since it swings on chains, the chicks will be reluctant to roost on top of it.  Radiant heat has one temperature and no light to keep chicks up at night.  The unit is completely sealed so there is no fire danger.

I am in the process of changing out all of my indoor heat lamps and replacing them with Sweeter Heaters.  I have used heat lamps with brooders for ten years, but I have always had that nagging feeling that I should replace them.  I brood chicks all year long so it was best to switch to the Sweeter Heater method.  It will be cheaper in the long run on the electric bill and I will have the peace of mind that no bulb will burn out and leave all of my chicks in the cold.

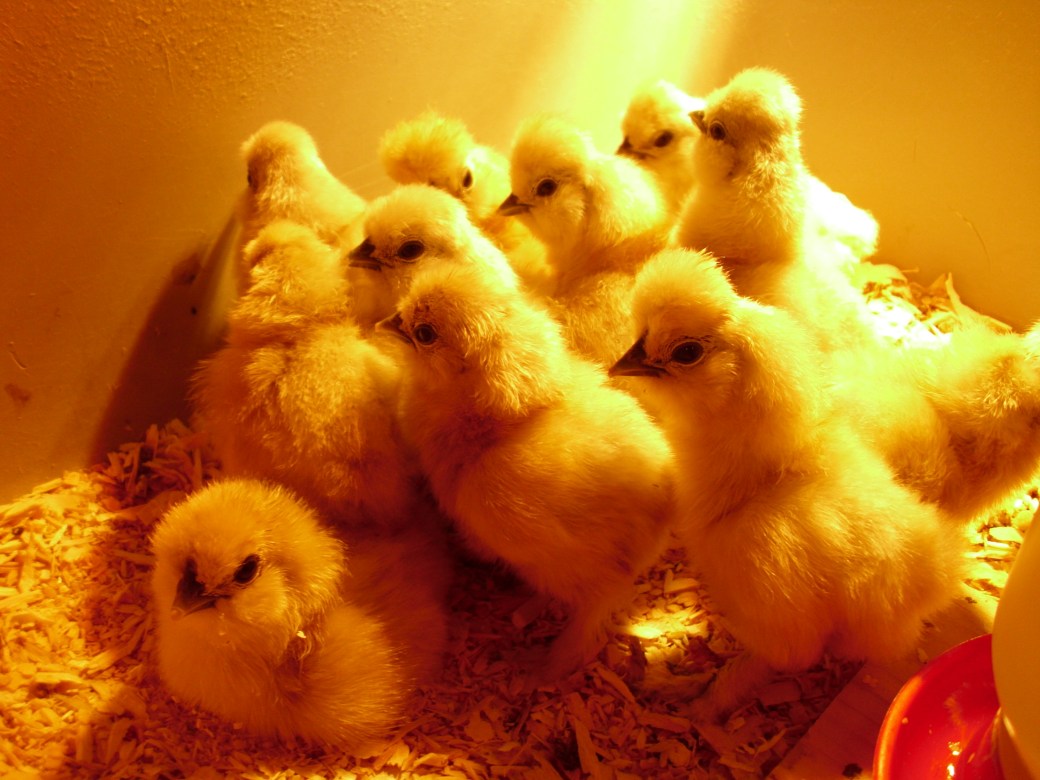
Chicks will let you know if they are too warm or too cold by their behavior.  Cold chicks huddle up and cry (cheep). Too warm of chicks stretch out to the corners of the brooder to get away from the heat source.  Chicks that are just right will wander around all over the brooder doing typical chick things like eating and drinking.

If you are still undecided on what kind of chick brooder to get, check out “The Perfect Chick Brooder“.

For tips and tricks for raising outstanding silkies check out our Chicken Learning Center at VJPPoultry.com .  VJP Poultry is an NPIP and state inspected hatchery located 30 miles north of St. Paul.  We hatch out silkies all year long so we always have stock available.  Like us on Facebook to get weekly updates on what we currently have for sale.

Victoria J. Peterson


VJP Poultry newborns 4


The Perfect Chick Brooder

20180301_154220
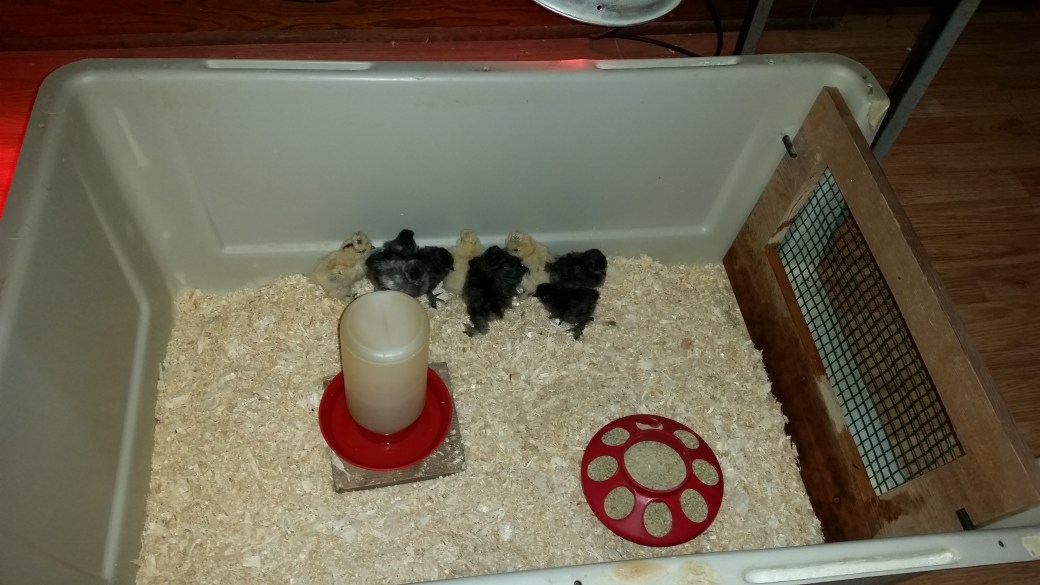
A brood is a group of chicks that are hatched or cared for at one time such as a hen with her brood of chicks.  A brooder is a place where a young chick can be kept safe and warm.  It takes the place of the mother hen but still can provide warmth and protection.  Even if you always use a broody hen for your hatches, it is good idea to have one available for emergencies.
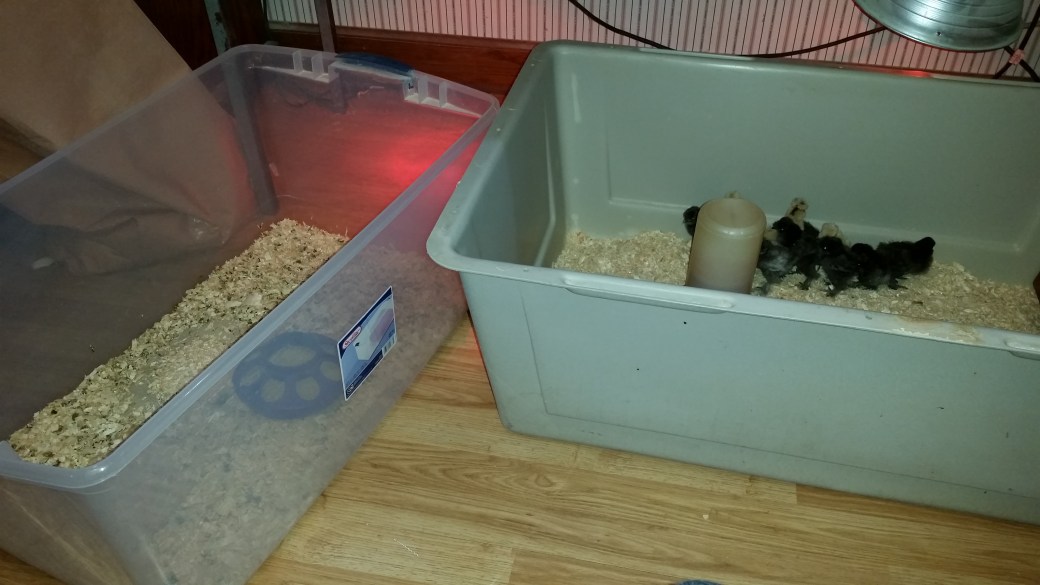
This article is going to concentrate on the brooder box itself.  The box is an important starting point. The dishes, food, bedding and heat lamp are all added after the box is chosen.  There is an abundance of options out there for brooders.

The basic brooder can be made out of many different kinds of materials such as plastic, metal, wood or cardboard. You can buy a ready made brooder or you can make one yourself out of a cardboard box or plastic tote.  I prefer plastic because it is easy to clean and you can use it for multiple hatches.  Cardboard falls apart when it gets wet and damp conditions are not healthy for the chicks. Heat lamp use with cardboard and pine shavings can be a fire hazard unless you are extremely careful with mounting the heat lamp.

There are some wonderful brooders available.   A brooder box  or a rabbit hutchcan make a very sturdy brooder.  Some people use a wading pool  or even a dog carrier.    Whatever works for you.  Your choice will have to do with what time of year it is and whether the chicks will be inside or outside.  If outside, you will need to protect both the brooder and the chicks from the elements.

Folding play pens also can make great brooders.  Remember that protection from the outside world is very important.  The sides should be high enough so that the chicks do not jump out and that other pets cannot get in.  Twelve inches high is a nice height.  You will also need some kind of a top.  I just place a window screen on top that can be easily removed and can allow for maximum ventilation.  A larger screen can be used with larger brooders.

The size of your brooder will depend on how many chicks you are brooding.   Newborns up to 4 weeks old need around 1/4 square foot per chick.  Five weeks and up will need around 1/2 square foot per chick.  Bantam breeds will not need as much space as they are smaller.  It is better to buy a larger brooder and then use dividers to make it smaller for newborns.  A smaller space allows for a warmer area for newborns.

There are several home brooder kits that allow you to change the size of your area.  Some brooders come with stands for the heat lamp and other kits have even more extra equipment included.

Chicks stay in their brooder until they are feathered out (have lost their baby down and now have actual feathers).  I brood mine until they are ready to move outside at about 10 weeks.  Ten week old birds will not fit into their baby chick brooders.  As your chicks grow, you will need to find larger brooders or set up a brooder situation inside of their outdoor coop.

If you plan on brooding chicks every year then I would suggest something that is going to last and is easy to clean.  I have had the most success with plastic tote brooders or brooders made from large plastic dog carriers.  I use the plastic totes for the newborns and the dog carriers for larger chicks.  The clean up very easily.  Ventilation is important but brooders should not be drafty especially for newborns. If you need advice about how to heat your brooder check out “How to choose a heat source for your Brooder“.   For information on taking care of newborn chicks check out “Silkie Chick Management20180301_154243“.

For tips and tricks for raising outstanding silkies check out our Chicken Learning Center at VJPPoultry.com .  VJP Poultry is an NPIP and state inspected hatchery located 30 miles north of St. Paul.  We hatch out silkies all year long so we always have stock available.  Like us on Facebook to get weekly updates on what we currently have for sale.

Victoria J. Peterson

20180301_154105

How to Effectively Control Chicken Dust

Snapchat-504766167-1Chicken dust can drive you crazy.   It is that fine white powder that works its way into every crevice and surface it can find.  If you keep brooder chicks in your house, you will find chicken dust all over your home.  Your outdoor coops can be very dusty as well to the point of making you gag every time you enter .the front door.

Chicken dust and poultry dust are different things. Chicken dust is a mixture of chicken feed, bedding material, bird droppings and feathers and dander from a chicken.  Poultry dust is a chemical powder that you buy and use in your coop and on your bird to prevent mites and lice.  We will be discussing chicken dust in this article.

There are four main things that can cause chicken dust.  The first is made by chickens themselves and it is the number one cause of the dust.  This is chicken dander.  Dander is microscopic flakes of dried dead and shed skin.  It can also come from the shafts of their feathers.  Because chicks grow quickly, their skin cells are constantly turning over and shed off of their bodies.  If your chicks are less than 18 weeks old they are constantly molting and growing feathers.  The cuticle that sheathes the pinfeathers as they emerge, break off and contribute to the dust.  Any age chicken that is going through a molt is creating more chicken dust than they usually would.

The second creator of chicken dust is chicken feed.  If you are using crumbles such as chick starter, the fines (very fine, ground up dust from feed) are seen in your dish and at the bottom of your bag when you shake it out. As the chicks eat the food, they break it up into small pieces which fall into the feeding dish and create dust.  Using a pellet form of food for adult birds will help cut down on the dust from the feed.  Moving feeders outside will keep the dust from accumulating in the coop.

A third dust creator is is dry chicken poo. As it becomes hard and dry it can start to break down and become dust. Birds walking on it can help to make smaller pieces which leads to dust.  I try and scoop up poo from outside in the run and inside the coop whenever I see chunks of it. I like the Activarmr gloves for this and all chicken jobs. They are flexible for picking things up and the bottoms are waterproof.  Picking up poo keeps things looking cleaner and gets rid potential dust.

The last dust maker is from bedding.  Pine shavings can be very dusty if you are buying the small flakes. Small flakes can be very powdery and very saw dust lik. Try to buy large flakes or a dust free bedding.  Some bedding becomes dusty as it decomposes such as pine needles, straw and hay.

Snapchat-1048276017

Dust in the house is a real nuisance.  One way to prevent it is to keep your brooder in the garage and clean the brooder regularly.  Incubators inside the home attract a lot of dust due to hatching. Besides regular cleaning after use, us an air hose to blow out dust around the fan to keep the incubator in good working order. I use a feather duster to dust everywhere dust has accumulated inside on flat surfaces such as heat lamps hoods.  Other dusters such as microfiber dusters are great for those hard to get at spots.

I have a Neato robotic vacuum which I just love. Neato vacuums my entire house everyday. He helps me to be a better housekeeper by keeping extra things off of the floor so that he has more room to vacuum. This has led me to removing unneeded things off of tables and shelves so that I am able to dust faster and easier.

One other thing I have in the house is an air purifier.  We keep ours in the room where we do incubation and hatching. I keep the door to this room closed to keep the dust centralized.

If you have been out to our place, you know that we have our chick room off the garage. This winter we installed an air exchange with filter. It is filtering and exhausting  air to the outside of the house.  This also helps to reduce the humidity created by all of those little chicks breathing and reduces odor. The chicken dust is trapped by the filter.

In the outdoor coops we always leave every window and door open all year round so that the dust can find its way outside. We installed turbine ventilators in the roof to draw air out and cool things down.  Fans in the windows also blows unwanted dust out.

When I begin to clean the coops outside, I first remove all of the old bedding and empty it out. Then you can use a shop vac or a leaf blower to remove accumulated dust on the walls and ceiling.  Make sure that the windows and doors are wide open so that the dust can be blown out.  Wait ten minutes so that the dust in the air has settled and then wipe everything down with a wet cloth using a sanitizer or broad – spectrum disinfectant or a coop cleaner.  For more information about cleaning a chicken coop check out this blog.

Always wear protective masks and eye wear when cleaning the chicken coop. There is such a thing as  occupational asthma for people who work in the poultry industry.  Always protect your airways with disposable face masks.   You should also wear safety glasses to keep the dust out of your eyes.  Your health is important.

For tips and tricks for raising outstanding silkies check out our Chicken Learning Center at VJPPoultry.com .  VJP Poultry is an NPIP and state inspected hatchery located 30 miles north of St. Paul.  We hatch out silkies all year long so we always have stock available.  Like us on Facebook to get weekly updates on what we currently have for sale.

Victoria J. Peterson

Snapchat-247551328-1

My Experience With VJP Poultry from Cage-Free Mom

20180206_141456-1
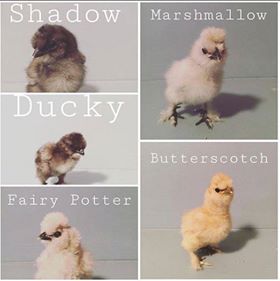
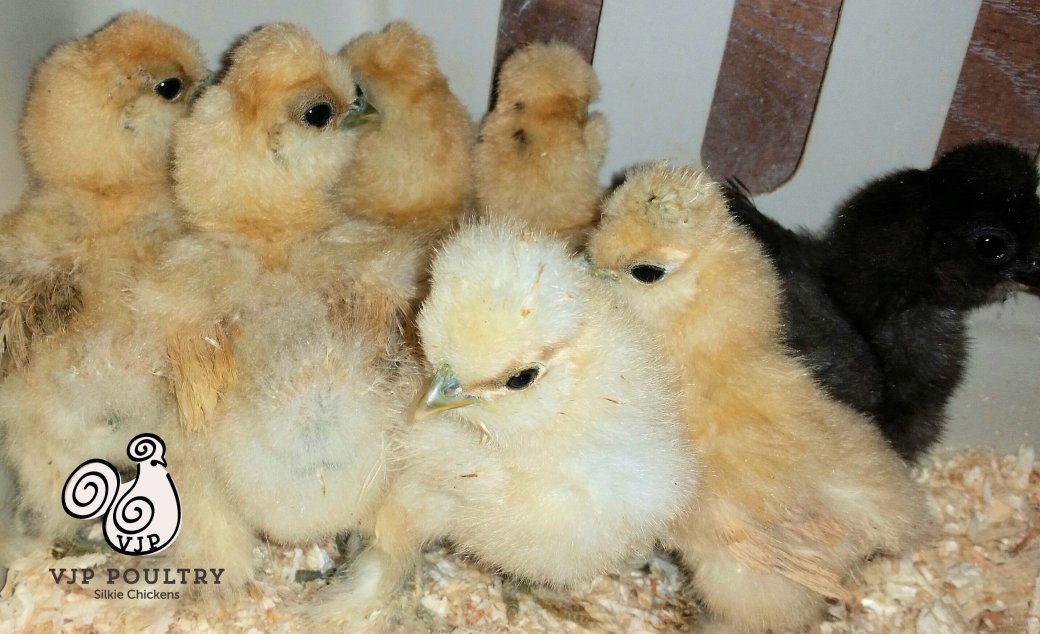
When we decided to get chickens, we knew we wanted them as pets and not for meat production. That led us down a rabbit hole of research and getting opinions from people we trusted. We decided that we were going to get some Silkie chickens. They are known for being friendly , beautiful, small and easy as well as having fairly good egg production (3 per week). Everything we wanted in our first batch of chickens.

A friend of mine referred us to VJP Poultry in Forest Lake, Minnesota. One of her friends had some show chickens from VJP that had done very well in the 4-H program. We were relieved to find someone near us that had quality chickens. They are NPIP tested and hold a State of Minnesota Hatchery Permit. We felt confident that we could get some great chicks from here.

At that point I still wanted to do some more research on how to care for our new chickens and how to sex them so we wouldn’t end up with all roosters! The internet gave me a bunch of mixed information (turns out it is nearly impossible to sex Silkie chicks) so I decided to reach out to VJP Poultry and see if they could give me any nuggets of information! The response time was very fast and they were very patient with all of my questions. I was relieved that they have a rooster return program. I was really nervous about this because in our area, we are not allowed to have roosters. If we do end up with any roosters we can return them to VJP and they will re-home them. Every question was answered and we were welcomed to come out and see their options.They do post weekly on their Facebook Page VJP Poultry Facebook which is very helpful. You can see what colors and ages are available as well as the pricing of them.

Not only do they have great customer service but they also run blog posts on their website. They have links to items you can purchase for your chicks/chickens , articles on ventilation and how to keep your Silkies safe and happy during the winter.

We set a date and went out to see the chicks. Victoria (owner) met us and gave us some time in the chick room. It was nice to have some time to check all the chicks out and discuss our options without feeling the pressure of picking right away. When she came in, she was able to guide us in the right direction. We really wanted a few splash chicks so she went upstairs and brought down some 4 day old babies. We fell in love and decided to take them.

Along with the chicks, she provided us with some bedding and a little sheet giving us tips on how to care for young chicks as well as a copy of their certification.  We were very pleased with our experience and will be returning for all of our future Silkie purchases! I highly recommend them and if you are anywhere in MN or surrounding states, go check them out as they do not ship. Tell them Ashley with Cage-Free Mom sent you!

Stay tuned for pictures of our new chicks! (Shadow, Ducky, Butterscotch, Marshmallow & Fairy Potter)

You can find more blogs from Cage-Free Mom here.   Text and lower picture by Ashley Molin – The Cage-Free Mom

For tips and tricks for raising outstanding silkies check out our Chicken Learning Center at VJPPoultry.com .  VJP Poultry is an NPIP and state inspected hatchery located 30 miles north of St. Paul.  We hatch out silkies all year long so we always have stock available.  Like us on Facebook to get weekly updates on what we currently have for sale.

Victoria J. Peterson

27849186_860120317525318_1757353654_n

Silkies For Sale – 1/31/18