Egg Color and Colored Earlobes in Chickens

20180324_153532-1Chickens lay a rainbow of colors when it comes to egg shells.  White, cream, tan, pink, blue, green, brown and speckled.  But did you realize that a chicken’s earlobes are different colors as well, and that some people can make guesses as to what color egg a certain hen will lay based on her earlobe color.

A chicken’s ears are located on each side of its head, just below its eyes.  They do not stick out like most animals do.  The ears are located inside of the head.  The earlobe is just below the ear.  It is a slight thickening of the skin and is smooth with no feathers.

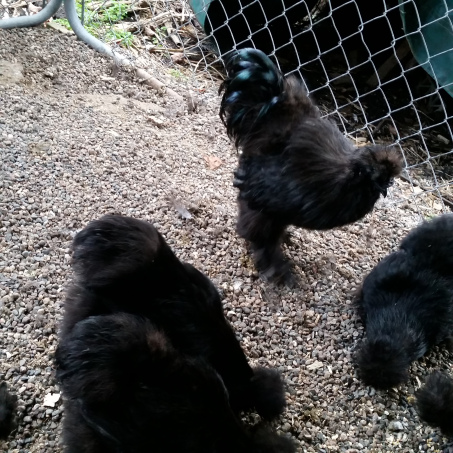
Birds are the only animal that lay colored eggs.  Popular folklore says that if a chicken’s earlobes are white, they will tend to lay white eggs.  If they have red earlobes they will lay brown eggs.  We know that there are many exceptions to this.  Some red earlobed birds lay greenish or blue eggs.  Silkies have turquoise earlobes and lay a cream colored egg.  Chicken breeds which have white earlobes with a pearly iridescent shine such as a cream legbar, lay blue eggs.

Eggshell color is definitely based on breed.  Unless you have a mixed chicken, the birds will lay true to their breed.  Araucana have red earlobes and lay blue or green eggs.  Penedesencas have white earlobes and lay dark brown eggs.  Some Americanas have white earlobes and lay blue eggs.  Earlobe color is based on breed genetics as well.  You can’t correlate earlobe color and egg shell color because one is not based on the other.

Depending on the breed, a hen will lay about 500 eggs in her lifetime.  All eggs start out white.  Those that are other shades have pigments deposited on them as the eggs travel through the hen’s oviduct.  This journey takes about 26 hours until the egg is laid.  The shell itself takes 20 hours to complete.  Ameraucanas have the pigment oocyanin deposited on the egg as it travels.  This pigment permeates the eggshell resulting in both the inside and the outside of the shell being blue.

Chickens that lay brown eggs deposit the pigment protoporphyrin on the eggs while they are forming their shells.  This pigment only stays on the top of the shell.  The inside of the shell remains white.  The darkest brown eggs are from Marans.

In order to create a green colored egg, a brown pigment overlays a blue egg shell.  The darker the brown pigment, the more olive color the egg will look.

No matter what color the outside of the egg is , the inside will all look similar.  The color of the yolk is determined by the hen’s diet.  The more green veggies in the diet, the deeper the color of the yolk.

Chickens have two ears on each side of their head.  They have eardrums and an outer ear, middle ear and inner ear.  They are able to harness sound waves and send them to the inner ear.  Unlike humans, who experience hearing loss as they age, chickens are able to regrow damaged hearing cells.  Scientists are very interested in learning more about this special adaption and in being able to apply it to help humans with hearing loss.

Hearing well is very important to all birds.  It is imperative that they can hear approaching predators.  Chickens can tell how far away a sound is coming from by gauging how long it takes the sound to reach the ear.

Baby chicks are able to hear their mother clucking from inside of the egg.  An embryo can hear by around day 12 of their incubation period.  Once hatched a chick will respond to its mother tapping on the ground when she finds food.  If you tap on the food dish your baby chicks should come running.

Ear infections in chickens are often caused by bacteria entering the ear.  Antibiotic drops can be given for 3 to 5 days if the infection is caused by bacteria.  Clean the ear with hydrogen peroxide and a Q-tip to loosen any debris on the ear.  Do not put a Q-tip deep into the chicken’s ear as it can damage it.

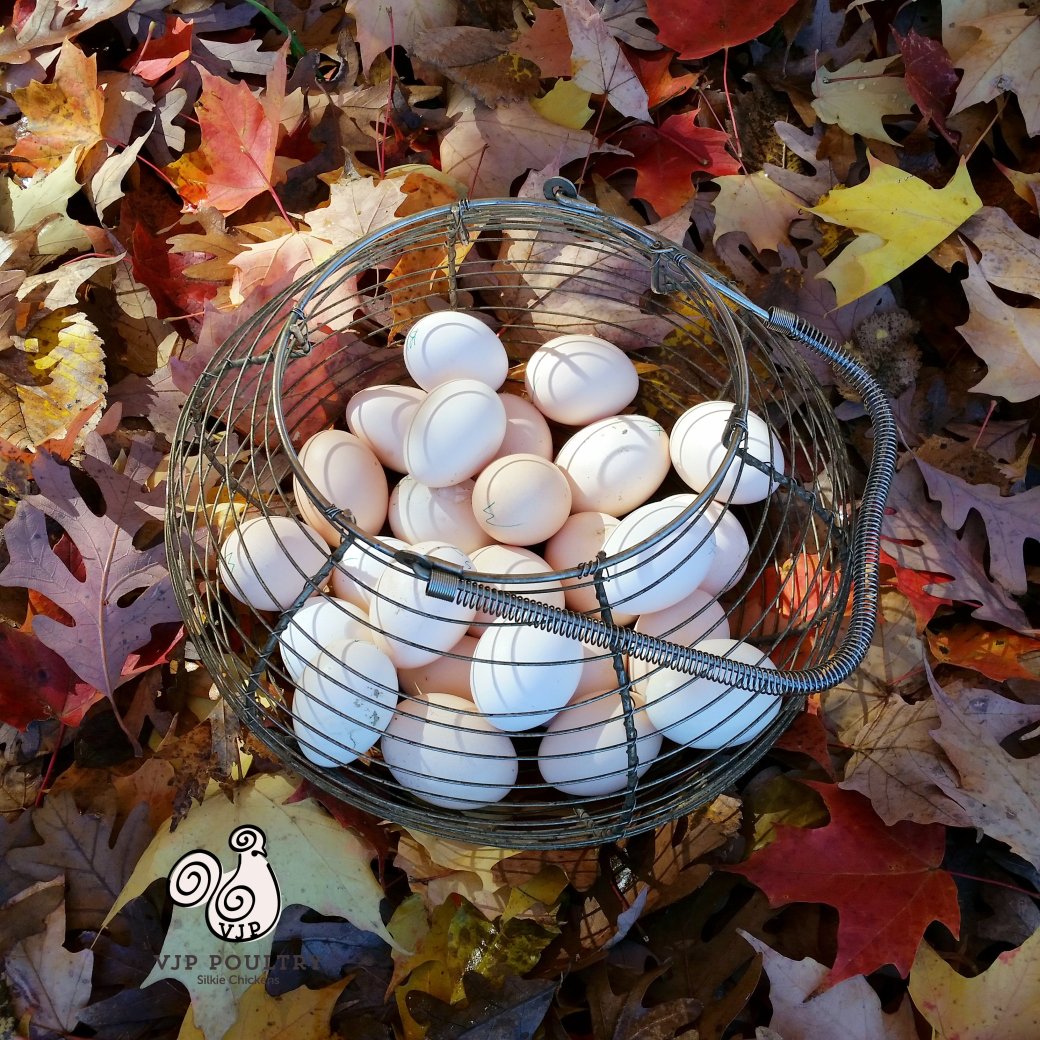
Timely egg collection is important.  Don’t leave eggs under hens unless you plan on hatching.  I like to use a wire egg basket to  help me handle all of the eggs if find.  If you are interested in more information on egg collection check out our blog.

It is fun to see the assortment and variety of egg colors that can come from your hens. You can display them quite creatively with an egg spiral holder or egg counter holder.  Eggs that have not previously been refrigerated can stay on your counter for about a week and stay fresh.  You can get quite fancy with your egg storage holder.

For tips and tricks for raising outstanding silkies check out our Chicken Learning Center at VJPPoultry.com .  VJP Poultry is an NPIP and state inspected hatchery located 30 miles north of St. Paul.  We hatch out silkies all year long so we always have stock available.  Like us on Facebook to get weekly updates on what we currently have for sale.

Victoria J. Peterson

20161018_132530

How to Prevent Pasty Butt in Baby Chicks


20160919_121349
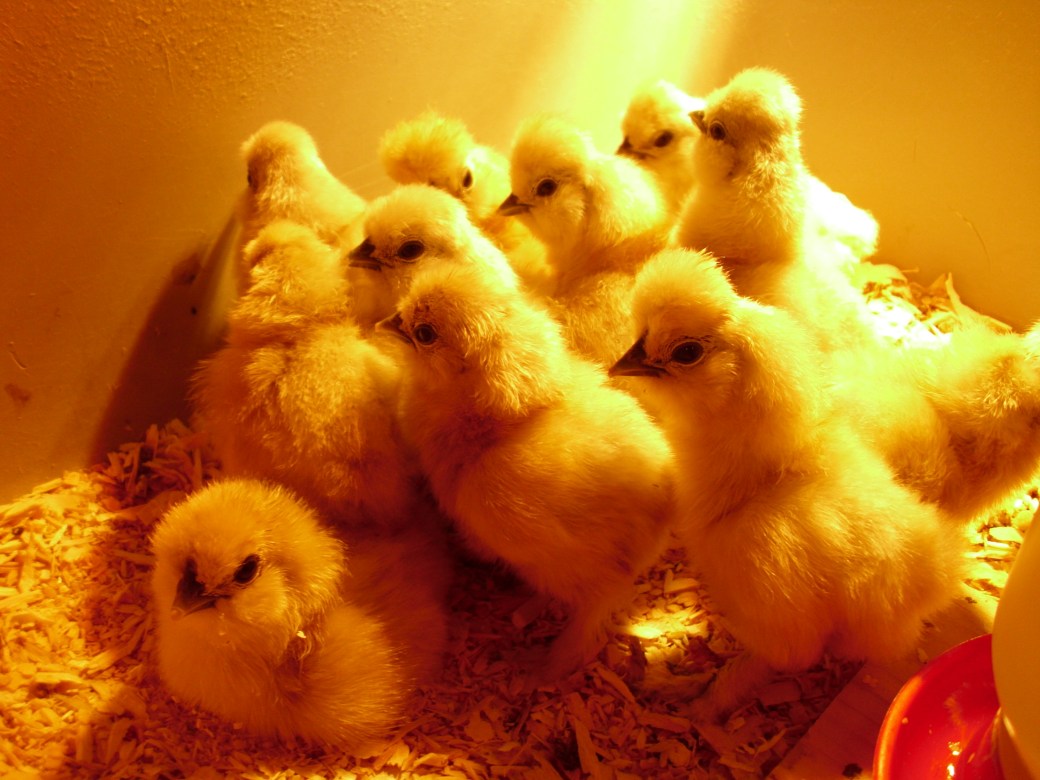
Almost everyone has had a chick which has had a piece of poo sticking to its behind.   We try to remove it and end up making an even bigger mess by smearing  the poo around the poor chick’s backside. It ends up drying hard like cement or worse capping the vent causing a small explosion of backed up poo when finally removed.  There must be a way to prevent all of this from happening again.

Pasty Butt or “pasting up”, is a condition in which the little chick’s poo gets stuck to the vent (small slit on chick’s back end) and “stops up” the chick like a cork.  The chick can’t eliminate its poo and the poo gets backed up into the body of the chick.  This can kill the chick fairly quickly if not removed.

If I see that a chick is plugged up, I will carefully remove the piece of poo with my fingernail. I gently tug, being careful not to hurt the chick. This works best when the poo is dried. Some feather down may come off with the poo using this method.  Sometime there is too much poo and it is too wet to remove it with your fingernail.  I will then use a Q-tip and warm water to soften the poo until it comes off.  The disadvantage with this method is that now the chick has a wet behind and can quickly become chilled.  I gently dry it off with a towel or paper towel and place it back under the heat lamp to finish drying.

Pasty Butt is common in chicks sent in the mail or in crowded feed store bins.  It tends not to happen in chicks who are hatched and raised by a broody hen.  Their temperature is regulated by her feathers and she will take care of making sure that their behinds are clean.

When you’ve hatched out chicks in an incubator or have had chicks arrive in the mail, you must take the place of the mother hen and clean the chicks yourself.  The new baby chicks will not be able to clean themselves until they are at least a week old. They are not capable of reaching around to that spot to clean it properly.  This will be your job as surrogate mother hen.  You will need to check your chicks regularly for the first week of life.  After the first week is finished pasty butt  is less common and they are better able to keep themselves clean.  Their bodies have also become better regulators of heat and their digestive system is better able to handle new food.

When checking your chicks, don’t confuse the vent with the belly button.  The vent is immediately below the tail feathers.  It is a thin line that opens and closes.  This opening is also through which the eggs will come out of the hen’s body when she starts to lay.  The belly button is between the vent and the chick’s legs.  There may, perhaps, be a piece of the umbilical cord still there.  Don’t pull on it as sometimes intestines can still be attached to it and you can end up pulling out the baby chicks bowels.  The cord will drop off itself in a day or two.

You may wonder what causes pasty butt in the first place and why do only some chicks suffer from it.  Silkies in particular seem to get it quite a bit.  This may have something to do with their extra fluffy down.  The poo seems to stick to it quite easily.  It may help to put a dab of vaseline jelly with a Q-tip right below the vent line.  The poo is then unable to stick to the down.

Temperature regulation has a lot to do with whether your chick will develop pasty butt.  Too hot or too cold conditions will bring on an outbreak.  Chicks that are sent in the mail often are left in cold mail rooms where they may become chilled.  If mailed out in the summer they may also suffer from too warm of conditions.

250 Watt  Heat lamp bulbs can often put too much heat into your small brooder.  Try a smaller watt bulb or use a different heating source.  I like  the Ecoglow or the Sweeter Heater.  They both mimic a mother hen by creating a warm cave where the chick can feel protected.  I have not found them to be too warm.  Radiant heat does not heat the air but does heat the chick and bedding.  Watch your bird’s behavior.  They will let you know if they are too hot or too cold.  Chicks that are too cold will huddle up together and make loud cheeping sounds.  Chicks that are too warm will spread out to the corners of your brooder to try and get away from the heat source.  For the first week the brooder should be 90-95 degrees.  For more information check out How to choose a Heat Source for your Brooder.

Placing the chick in stressful situations will also bring on pasty butt.   Overcrowding in the brooder can bring on stress for baby chicks.  Too many chicks can trample each other in their frenzy to find the best spot in the brooder, best place to get food or best place at the waterer.  Stronger chicks will walk over weaker ones.  Smaller chicks can get squished into corners.  Keep your numbers in the brooder manageable.  Newborn chicks need about six square inches of space each.  They also need space in which to get away from the heat source if they need to.  More information about brooder size is at Choosing the Perfect Brooder.

Other things that can cause stress are loud noises and frequent handling by over eager children.  The first week of life should be a time of calmness with no major transitions.  They are very cute to look at but when you sweep your hands into their brooder to scoop them up all they are thinking about are flying predators.  They instinctively know that they should fear things that come from above.  Try moving the brooder off the floor and onto a table where your presence is not so threatening.  Keep the brooder in a quiet area.  Limit your handling of the chicks during that first week.  There will be plenty of time later to cuddle with your chick.  Chickens do not imprint like some other birds. There is not need to try and tame them that first week.

Baby chick’s first food should be “Chick Starter” crumbles.  The size of the crumbles can vary.  For the first week of life I recommend grinding the chick starter up so that it resembles powder. I use a coffee grinder. I think that this is easier to digest than some of the large crumbles that are in some packages.  Pasty Butt poo is sometimes very loose and runny.  Oatmeal can firm it up. I take old fashioned oatmeal and grind that up in a coffee grinder and then add it to the ground up chick starter.  I make a batch that is 1/4 oatmeal and 3/4 chick starter.  They seem to really like it and tend to eat more food with the oatmeal in it. I will also sprinkle some chick grit (sand) on top of it, kind of like just adding a sprinkling of salt to something.  This will also help to firm their poo up as well.  Grit can also be offered in a separate dish.

Treats should be given very sparingly that first week.  I wouldn’t give them any treats beyond ground up oatmeal, hard boiled egg yolk, or perhaps some plain yogurt.  Pasty butt is often a result of the chick switching from nutrients found in their egg to the new food out in the world.  Stick with the chick starter for now.  There is plenty of time for treats after they are a week old and their digestive systems can better handle it.

I do add some things to their water.  Probiotics and vitamins can give them a good start.  Rooster Booster has both vitamins and probiotics .  It can be added to water or sprinkled on feed. Probios is also a choice for adding active cultures to your chick’s gut. Gro – 2 – Max is a product that is organic and provides probiotics for your water .I also add a splash of apple cider vinegar to their water for gut health.

Be on the lookout for listless behavior.  I notice that my chicks move and walk differently when they have pasty butt.  They do not feel well when they are plugged up.  Remember that temperature, stress and food each play a role in your chick’s health.

For tips and tricks for raising outstanding silkies check out our Chicken Learning Center at VJPPoultry.com .  VJP Poultry is an NPIP and state inspected hatchery located 30 miles north of St. Paul.  We hatch out silkies all year long so we always have stock available.  Like us on Facebook to get weekly updates on what we currently have for sale.

Victoria J. Peterson

20170609_141000

How to get Beetle Green Sheen in Black Chickens


The green sheen on a black chicken is something very much desired.  You find it in the tail feathers, wings, saddle and hackles of solid, deep black feathered birds.  The purple sheen is not a desired trait and some will even say that it is a nutritional deficiency that causes it.

Microraptor was a very small, four winged dinosaur that lived 130 million years ago. Its feathers have been fossilized and they show black and blue hues similar to a crow.  It is the earliest evidence of iridescent feather color.  Microraptor was completely black with a glossy, iridescent blue sheen.

Feather color is produced in birds by arrays of pigment bearing organelles called melanosomes.  Iridescence happens when the melanosomes are organized in stacked layers.  This iridescence is widespread in modern birds and is frequently used in courtship displays.

In chickens, the green sheen on black is very much sought after and appears to be in part produced by the structure of the feathers and in part by the condition of the pigment in them.  It is found only in chickens with good black color and in the absence of any purple barring.  It can also be found in any chicken that has some black feathers such as partridge silkies.

The quality of the feather is a very important issue.  A black chicken with a strong green sheen will have a much smoother feather feel to it.  You should almost be able to feel how soft and conditioned that green sheen feather is when compared to duller feathers.

The amount of green sheen varies from bird to bird.  Some have a lot of sheen and others don’t.  Mostly it is found in roosters, but hens can have it too.  I have seen some beautiful sheen on the wings and body of very dark hens.  Sheen is more apparent in the sun where light can reflex off of the feathers.

Keratin is a crucial protein in bird’s feathers. The way it is structured allows light to twist and turn and separate.  It allows feathers to act like a prism by scattering the longer wavelengths of light and reflecting shorter ones to give us the gorgeous blues, purples and greens.

The preen gland is a gland that is located at the base of the tail. This secreted oil helps to keep keratin flexible.  This makes feathers appear more saturated with color.  Most birds preen by rubbing their beak and head over the preen gland pore and then rubbing the accumulated oil over the feathers on its body.

The green color you see is due to the effect of light scattering and reflecting off the feather structure.  This is called the Tyndall Effect and it creates the illusion of certain colors.

There are four basic types of feather luster.  There is green, red/purple, blue and matte- the absence of any sheen.  Feather sheen is a matter partly of genes and partly of feather condition.

Gold based blacks are easier to get the correct green sheen and eliminate purple sheen.  Green sheen is good and purple sheen is not among chicken breeders in the United States. A dilute black will not give you the same sheen display as a pure black color. Here is an article on my adult black silkie pen and what it is like to work with the black color.  That super black color is especially useful if you are working with varieties such as Paint Silkies.

If you want to breed towards improving green sheen you must selectively breed for those desired traits.  Breed green to green and remove birds with the purple/red sheen from your breeding program.  Have a separate coop to keep your breeding pair in; that way you can be sure of the parentage.  Keep track of your breeding pens and keep careful written records of parents and the quality of their offspring.  For more information check out “How to Keep a Flock History“.

The degree of iridescence seen on all feathers is a matter of condition.  A healthy bird on a good diet has more vibrant colors.  Excellent food and clean, safe conditions in the coop will go a long way towards bringing out the color in your birds.  Good health will improve the sheen of the feathers so they better reflect the light.

Feather Fixeris a supplement feed that people often use to improve a chicken’s feathers.  Any higher protein feed will help to condition feathers.  Adding vitamins and electrolytes to your bird’s water will also improve its overall health as well as probiotics and Rooster Booster.

For tips and tricks for raising outstanding silkies check out our Chicken Learning Center at VJPPoultry.com .  VJP Poultry is an NPIP and state inspected hatchery located 30 miles north of St. Paul.  We hatch out silkies all year long so we always have stock available.  Like us on Facebook to get weekly updates on what we currently have for sale.

Victoria J. Peterson

20161015_173613 (1)

How to Choose a Heat Source for your Brooder

20180309_092902
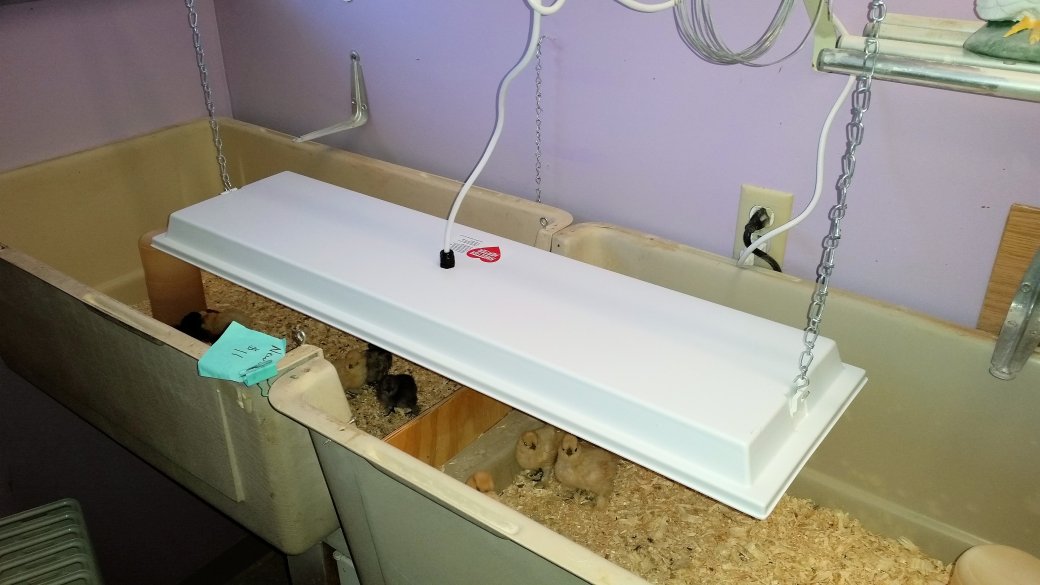
A baby chick runs to the safety and warmth of its mother’s wings. Here it feels secure and loved. The mother hen’s body heat warms the little chick and when it is ready the chick will dart out into the world to find food and water.  When choosing a heat source for your brooder you will want something that can be as close as possible to a natural mother hen.

Chicks need supplemental heat.  Their little bodies will not keep themselves warm enough until they fully feather out.  Feathering out means that they completely lose their baby down and develop true feathers.  This can happen at different ages depending on your breed of chicken.  The larger the breed, the sooner they will no longer need a supplemental heat source.  Most breeds need it for about six weeks depending on the outside weather.  Brooding in the winter is different than brooding in the summer.  The temperature around your brooder will make a difference in how long you keep your chicks under the heat.

Chicks also need steady heat both day and night.  You will need a heat source that is dependable and allows for a typical  sleep cycle.   A steady white light on them 24/7 is not normal or natural.  A red infrared bulb is better for their sleeping patterns and is supposed to cut down on any pecking activity among the chicks.

The basic heat formula that most people use for baby chicks begins at 100 degrees Fahrenheit for newborns. This is what the temperature of the incubator was. You then subtract 5 degrees for each week of age after that. A one week old would be 95 degrees, a two week old would be 90 degrees and so on.  I find that formula way too warm and could lead to your little chicks pasting up on their fluffy behinds. In the world of the mother hen, the little ones would be exposed to cooler temps much sooner and I think that less heat is better than too much heat when it comes to brooders.  You need to make sure that the chicks are able to escape any temperature that is too warm.

20180308_161312-1

The most common way to brood chicks indoors is with a heat lamp fixture and a 250 watt heat lamp bulb.  It is the cheapest way to go and many people use it especially if they don’t brood chicks very often.  The pros for going this route is that you can purchase them at most places that sell chicken supplies.  You can hang them at any distance from the brooder.  However, many things can go wrong.  The biggest issue is that they can fall into the brooder and start a fire.  They must be hung very securely.  Do not rely on just the clamp.  Use zip ties and chain to secure it.  We always use a double system so if one cord fails the other cord will prevent it from falling. I will put a flat screen on top of my brooder as an additional measure to keep the heat lamp from falling into the brooder.  Make sure that your heat lamp fixture has a porcelain socket, not a plastic one that can melt.  The bulbs will have to be replaced. I have found that they also lose strength as they get older and do not put out as much heat.  Always have extra bulbs available in case your bulb burns out.  If they bulb burns out at night your chicks will become cold and begin to pile up on each other for warmth.  This will cause the ones on the bottom to suffocate.  Always start each season with a new bulb.  I have found a 250 watt heat lamp bulb too warm for small brooders. You can get infrared bulbs at lower wattage. Always dust your bulbs and hoods as dust buildup can cause a fire as well.  Reptile ceramic heat emitters  can also be used as a safer alternative to heat lamp bulbs.

There are also heat lamp holders  that are caged at the top to operate safer.

Radiant heat is another brooder heat choice.  Radiant heat passes through air without warming the air.  There are several products that rely on radiant heat.  Brinsea’s Ecoglow , Titan’s Electric Mama Hen andRentACoop’s heating plate all use less electricity than  a heat lamp bulb and mimic a mother hen.  They are for small batches of chicks but the Ecoglow 50 can warm up to 50 chicks.   The advantages of these are that there is no fire hazard , it uses less electricity (14 watts vs 250 watts) and there is no disruptive light.  It is more like a natural mother hen by creating a little cave to hide under.  You can adjust the height of them as the chicks grow.  You do not have to hang it up as it stands on legs.  You will have adventurous chicks jumping up on top of it and creating messes but it is easy to clean up.  These types of radiant heat brooder heat sources work best if the air around it is above 50 degrees. They are not effective in outdoor use if it is less than 50 degrees.  These products are not as warm as a heat lamp can be and will not heat the air around it.  I think that these are nice if you plan on doing a batch of chicks every year.  It may be expensive at first but it will pay for itself in lower electric costs.  There is nothing to replace on it so you do not need to worry about bulbs burning out.

A Sweeter Heater uses radiant heat as well. Instead of being a free standing unit, it is hung from above or as a side panel as in the cozy products panel.  Sweeter Heaters come in different sizes and are the best heaters for people who brood chicks frequently.  Hang it above on chains so that they are just above the chick’s height.  Raise it higher as the chicks grow taller.  Since it swings on chains, the chicks will be reluctant to roost on top of it.  Radiant heat has one temperature and no light to keep chicks up at night.  The unit is completely sealed so there is no fire danger.

I am in the process of changing out all of my indoor heat lamps and replacing them with Sweeter Heaters.  I have used heat lamps with brooders for ten years, but I have always had that nagging feeling that I should replace them.  I brood chicks all year long so it was best to switch to the Sweeter Heater method.  It will be cheaper in the long run on the electric bill and I will have the peace of mind that no bulb will burn out and leave all of my chicks in the cold.

Chicks will let you know if they are too warm or too cold by their behavior.  Cold chicks huddle up and cry (cheep). Too warm of chicks stretch out to the corners of the brooder to get away from the heat source.  Chicks that are just right will wander around all over the brooder doing typical chick things like eating and drinking.

If you are still undecided on what kind of chick brooder to get, check out “The Perfect Chick Brooder“.

For tips and tricks for raising outstanding silkies check out our Chicken Learning Center at VJPPoultry.com .  VJP Poultry is an NPIP and state inspected hatchery located 30 miles north of St. Paul.  We hatch out silkies all year long so we always have stock available.  Like us on Facebook to get weekly updates on what we currently have for sale.

Victoria J. Peterson


VJP Poultry newborns 4


Silkie Wings – What makes Show Quality?

20180222_161805
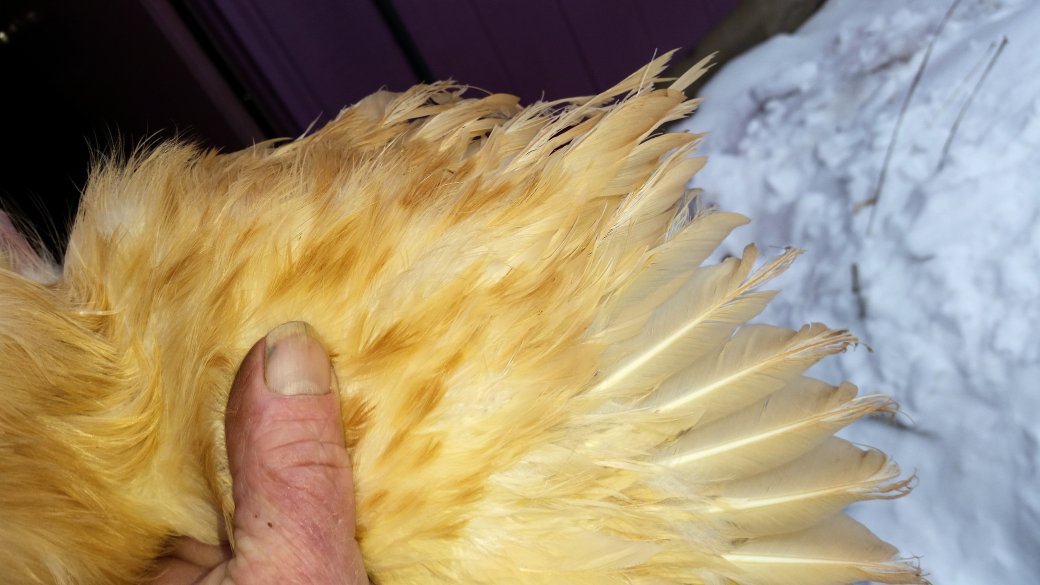
There has been lots of discussion about the difference between a show quality silkie and a pet quality silkie. Some of that has to do with their wings. I am going to talk about a few different problems that the silkie breed is known to have difficulties with as far as wings are concerned.

First of all, what is a perfect wing on a chicken?  The wings should be well formed when the wing is opened out.  You may see judges at a poultry show opening and shutting a bird’s wing.  You need to open the wing and stretch it out so you can see from one end to the other and look at every individual feather.  The formation should be perfect and easy to fan out. There should be no gaps showing and the feathers should form an arc.  When there is an open space between the primaries and the secondaries when the wing is opened, the defect is called a split wing.

There are ten primary feathers and ten secondary feathers. There should be no gap between them. There is also a small axle feather between the primaries and the secondaries.

The wing muscle should also be sufficiently strong enough to fold the wing back correctly and firmly.  The primary feathers should tuck under the secondary feathers and be held tightly to the body and into the cushion.  They should be held horizontally and not droop. The wing should be flat against the body and not stick out.

The entire body of the silkie should be covered in abundant fluff and the wings should be ragged, almost shredded or tattered looking.   Ideally, they should be shredded one third up the primary feathers.  No hard looking feathers should be visible.

20180222_162617-1

There are three main faults that can be seen in silkie wings.  Split wing is where the feathers have a gap between the primary and secondary feathers or at the top of the wing between the primaries.  You will always know when a wing is split as the wing feels weak and has a lot of give when handling it.  Both sets of feathers should be level. With split wing on set of feathers will be longer than the other.


Slipped wing is when the wing does not return to its natural folded position when opened. The primary feathers may overlap in reverse order or there is a tendency for the primary feathers to be held outside the secondaries when the wing is closed.  The primaries should tuck under the secondaries but instead the reverse happens. The primary feathers show from the outside and may even be twisted.   Angel wing is slang for slipped wing in chickens.  Actual Angel wing is found in water fowl.

Twisted feather is when a feather is in the slipped wing position but is turned upside down so that you are seeing the bottom side of the feather.

All three of these conditions are considered disqualifications in the show ring.  When assessing for faults in your bird make sure that you are not looking at it if it is heading into its annual molt.  The best age to be checking is the thirty week mark.  By this point the bird will be mature enough and is not usually going through a molt. You can begin to look at wings earlier at three to four months as most birds have fully feathered out by then to start getting an idea of what you want to save for poultry showing.

An APA standard is a valuable book to own. It gives you complete descriptions of what is correct for all breeds of chickens when you are showing. It also will let you know what is a disqualification or a fault. There is also the Bantam Standard which is also quite good.  Silkies are classified as bantams.

You should try and breed your best to your best.  These wing defects are a recessive trait and can be passed down.  Choose wisely and create breeding pens with your best hens and rooster.  A separate pen from the rest of your birds allows you plenty of room for your breeding program.  This article on “Selective Silkie Breeding” will give you some ideas on how to set a program up.

For tips and tricks for raising outstanding silkies check out our Chicken Learning Center at VJPPoultry.com .  VJP Poultry is an NPIP and state inspected hatchery located 30 miles north of St. Paul.  We hatch out silkies all year long so we always have stock available.  Like us on Facebook to get weekly updates on what we currently have for sale.

Victoria J. Peterson