 Humidity in the incubator has always been a tricky thing. Too much of it or too little of it can ruin your hatch rate. Humidity starts out at one percentage but then needs to be raised at just the right point in order for a successful hatch. This can leave some people scratching their heads at just how to accomplish this feat.
Air can absorb water. This water vapor is a gas. Water vapor in the air can range from none to the full maximum which air can hold. We call this saturation. This full maximum can increase as the temperature rises.
When talking about humidity in the incubator we are usually discussing the Relative Humidity. This is expressed as a percentage. It is a measure of the amount of water vapor in the air compared with the maximum that could be absorbed at that temperature. If the Relative Humidity level is 50% that means that the air contains half of its maximum possible water vapor capacity.
Most people (unless they practice dry incubation) shoot for 40-50% for the first 18 days of incubation and then raise it to 65-75% for the final three days of hatching. In general, slightly lower humidity is better than too high of humidity during incubation.
Start by following the manufacturers recommendations for humidity and temperature for your individual incubator. Then for future hatches you can tweak the numbers and make minor adjustments for what works best for you.
Many factors affect humidity such as : Egg size (the smaller the egg, the greater the moisture loss.), Porous shell (which increases with a hen’s age), elevation, egg storage length and conditions, weather, incubation temperature, air speed and shell thickness (which decreases with hen’s age. Thinner shells require higher humidity.)
Egg shells are porous and they allow water to pass through. The amount of water that an egg loses during incubation is important and is determined by the humidity levels in the incubator.
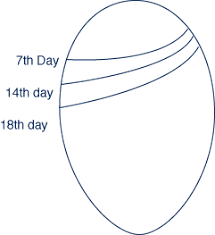
If you set your eggs with the pointy side down, you will notice an airspace at the top rounded part of the egg when you candle it. Water is lost through the shell gradually and is replaced by air which is also drawn through the shell. This airspace gradually increases in size. The greater the water loss, the larger the airspace.
This airspace is critical to the chick. It is the first air that the chick breathes and is needed in order for the chick to move into the correct position for hatching.
If the humidity has been too high during incubation, the egg will have lost too little water and the air cell will be small. This will cause the chick to have trouble breathing and will have trouble breaking out of the shell. Often you will see the chick’s beak protruding out of the shell. The bird is stuck and unable to zip around the shell and will not be able to hatch.
If the incubation humidity has been too low there will be very large air spaces. The chicks are often small and weak and will have trouble cracking the shell and hatching.
Monitoring air cells when you candle will also let you know if your incubator is maintaining the correct humidity. This chart shows you what your air cells should look like as the egg loses water. Use a pencil to draw the outline of the eggs air cell every time you candle.
During incubation, you can control humidity through the use of vents to monitor the amount of fresh air entering the incubator. The more fresh air entering, the lower the humidity. There are also pans of water that can be added to increase the humidity or troughs at the bottom of the incubator that can be filled with water. Covering the pans with foil will decrease the water surface area. It is not how deep the water is but the amount of surface area on top of the water that determines how much water will evaporate into the air.
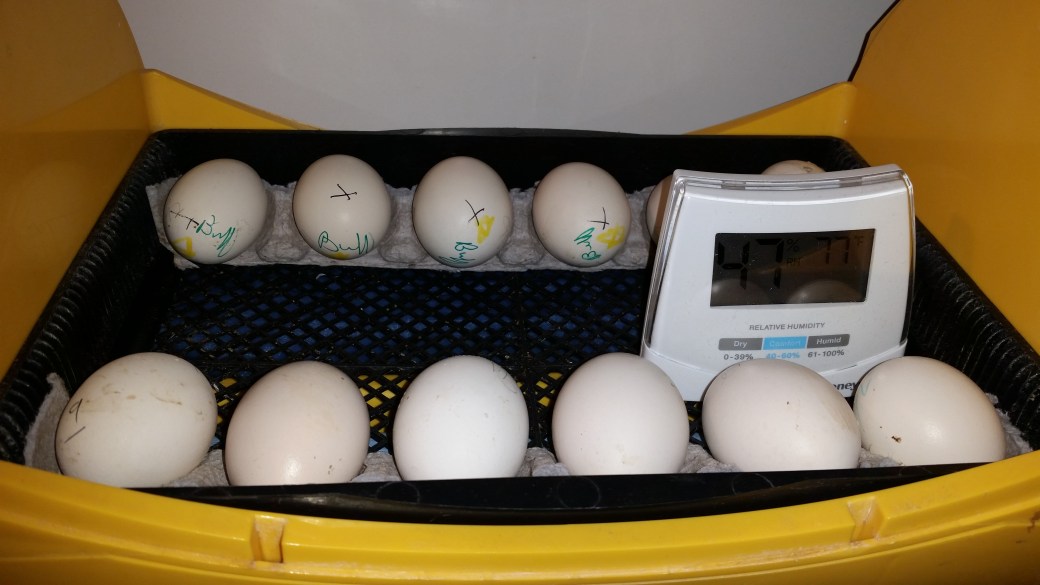
During the last three days of hatching, you will need to up the humidity in the incubator/hatcher. Add more water surface through the use of pans, troughs and sponges, humidity pads or wick pads. This is where a good hygrometer will serve you well. Use it to keep track of where your humidity is at.
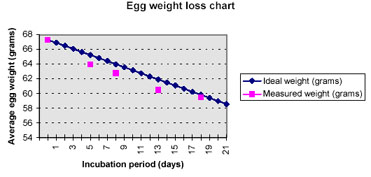
You can also monitor humidity during incubation by weighing the eggs. Most eggs need to loose 13% to 15% of their weight from the time of setting eggs until hatching. Weigh them every 5 days and chart their weight. Use this chart as an example. Adjust your humidity if your eggs are not losing enough weight or are losing it too quickly.
I use Hovabator incubators for the first 18 days of egg incubation. I only fill the first trough with water and remove the red vent plugs so that the eggs get plenty of fresh air. I end up putting additional water in that first trough about every three days. It will dry out if you don’t add more water. Depending on the time of year I am at around 50% for the first 18 days. Candling on day 18 should show an air cell that takes up about 1/3 o
I use a Brinsea Octagon for the last three days of hatching. I increase the humidity by placing two absorbent shop paper towels so that they hang into the troughs and up under where the eggs will sit. When the water is poured into the trough, it will wick up making a large wet surface area. This will increase humidity in the hatcher.
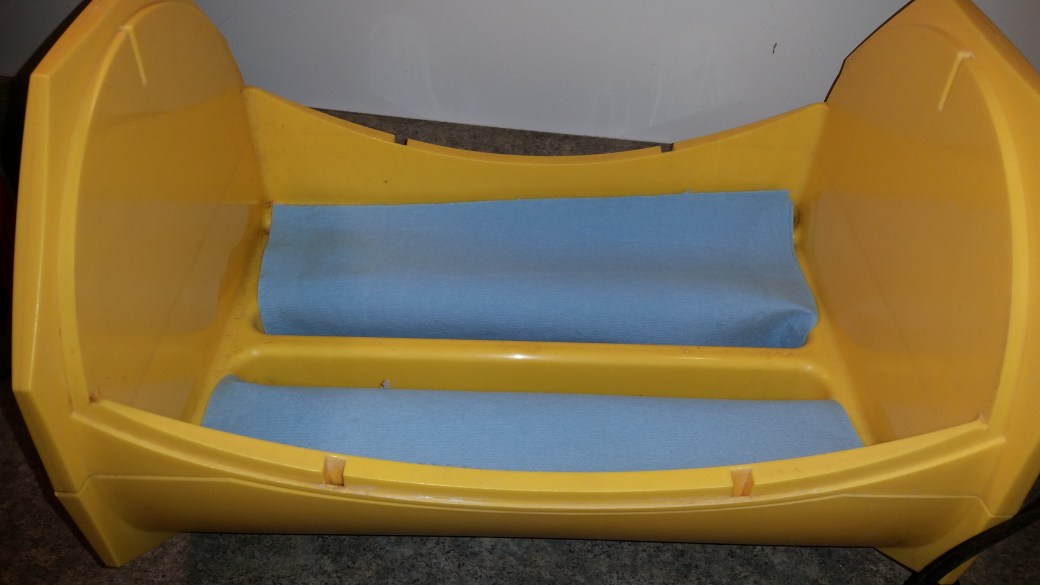
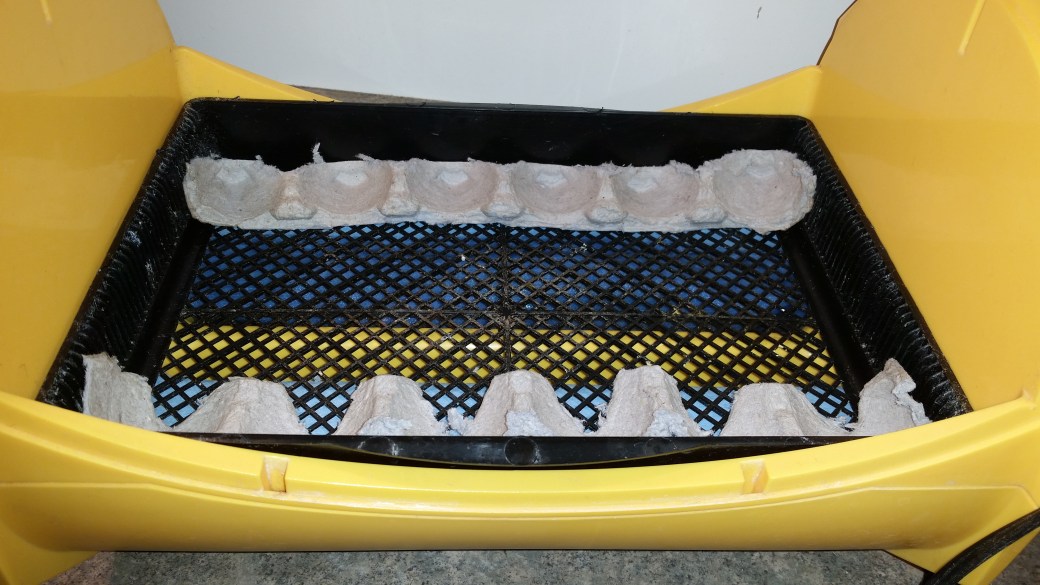
I begin by only filling one of the troughs with water and I place the basket that will hold the eggs on top. I then cut out little holders for the eggs made from paper egg cartons.
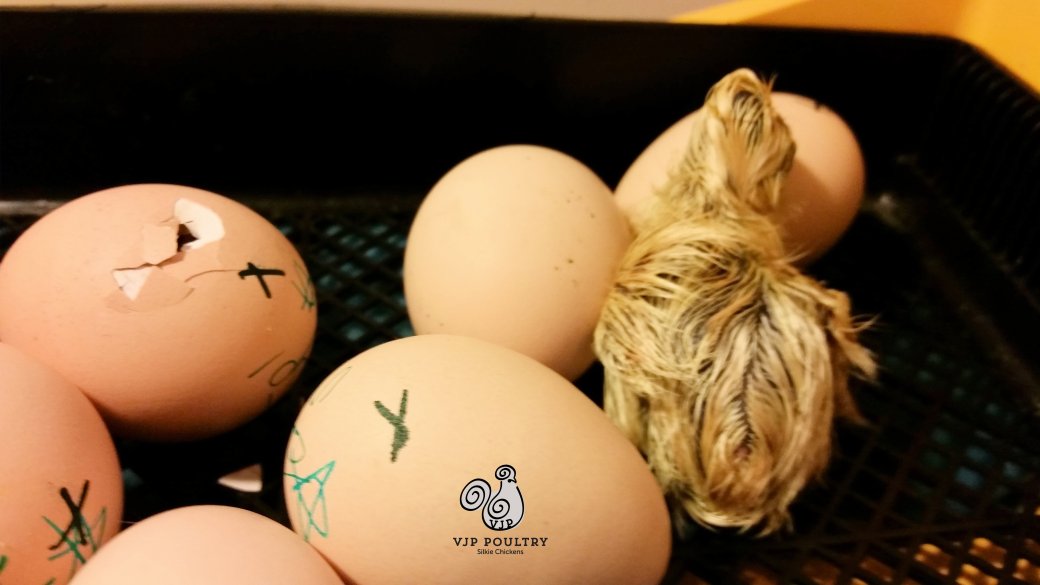
I place the eggs in their holders and leave the hygrometer inside where I can see it through the window. Humidity is around 66% at this time. The hatcher stays this way for day 18 and day 19. On the morning of day 20, I fill the 2nd trough with water and begin lock down. I like to wait until I see the first egg pip before I add water to the second trough. This will cause the humidity to go up into the 70s %. I keep the vents open slightly to let some fresh air in, but keep most of humidity trapped . Once the eggs start hatching I try to delay lifting the lid for as long as possible. Once the lid is lifted it is hard to keep the humidity up for hatching. It can cause the membrane to dry out and make it harder for the chicks to break through. If I need to open the lid I make sure to spray the inside walls with warm water to bump the humidity up faster. I have found that this method works very well for experiencing wonderful hatch rates.
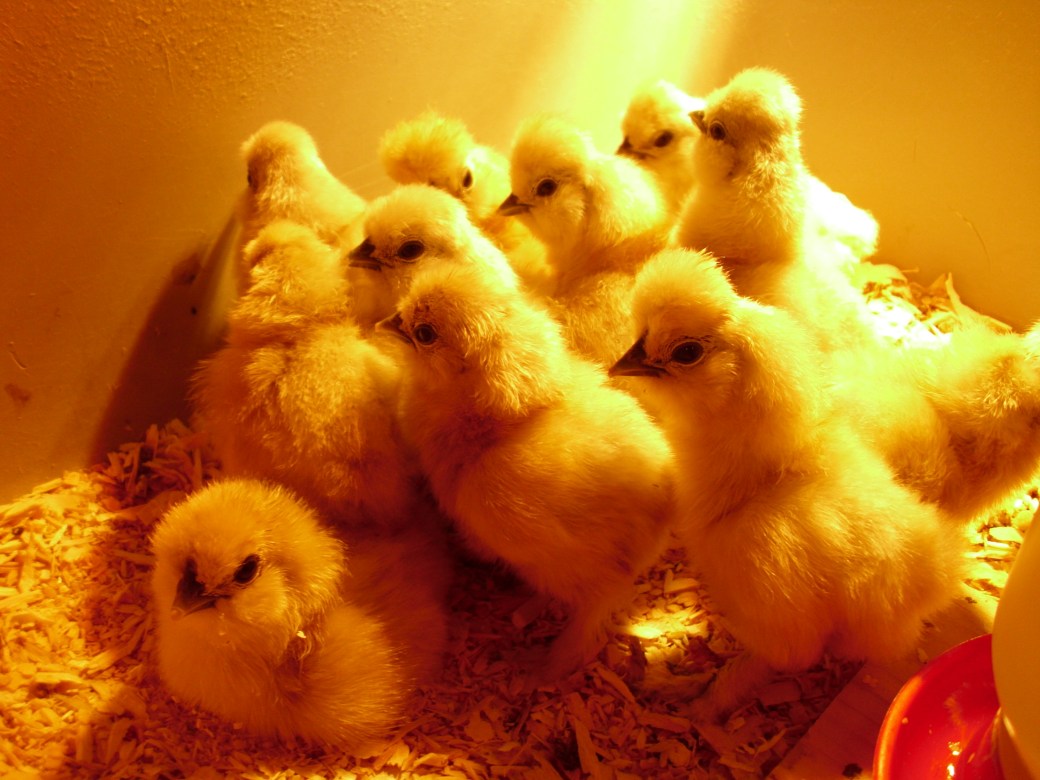
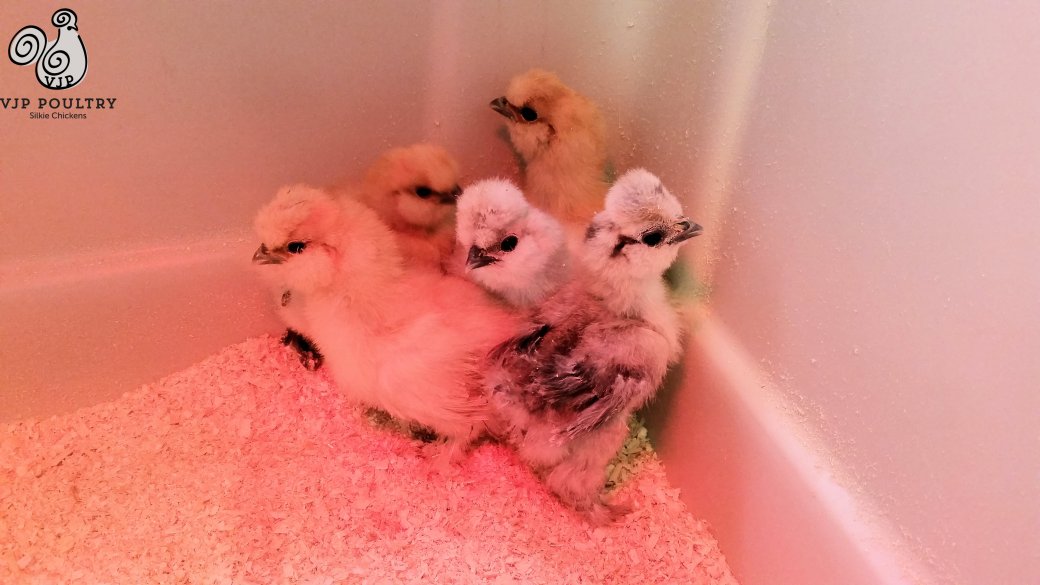
For tips and tricks for raising outstanding silkies check out our Chicken Learning Center at VJPPoultry.com . VJP Poultry is an NPIP and state inspected hatchery located 30 miles north of St. Paul. We hatch out silkies all year long so we always have stock available. Like us on Facebook to get weekly updates on what we currently have for sale.
Victoria J. Peterson
 We are always trying to think of ways to improve how we do things at VJP Poultry. We want to be able to complete chores more efficiently . Time is a factor and it is important that we look for ways to do things faster and better.
 Now that the weather is getting colder, I have a lot of VJP Poultry customers asking me about using