Tag: silkie chick information
The Instincts of a Mother Hen
 The “mother hen instinct” is a feeling that someone has, that they must “take care of somebody.” Anybody. A mother hen demonstrates behavioral habits that are different from a normal hen. Her priority shifts from her personal survival to protecting and ensuring the survival of her young. She puts her heart and soul into her chicks, educating them and protecting them from any and all predators.
A broody hen does not start out as a mother hen, but she has a fierce desire to become one. She will begin laying eggs in her special nesting box. She will be very territorial about this spot and not let others near her. She will sit all day on her nest in a trance state and will hiss, growl and peck at you if you try and remove her. She will only get off once a day to eat, drink and poo. She will appear to be all fluffed up and flattened out over her eggs.
To help a hen have the best chance at raising successfully her brood, she needs a secure broody coop. It should be all on one level without any ramps to go up and down. The hen should be isolated from the rest of the flock. Rival hens may attack each others eggs and chicks.
Most hens cover around 12-13 eggs. If she has too many eggs, she won’t be able cover them all. You may want to mark and date them so that you can know when to expect the hatch to happen. It takes 21 days for eggs to fully develop.
A broody my pluck their breast feathers and stomach area to make a bare patch or broody patch which is used to warm the eggs better. A broody will instinctively know which eggs are no good and will kick them out of the nest.
The hen does all the work of turning and adjusting the eggs. The will be constantly fussing with them. The hen’s body will keep the eggs the right temperature and at the right moisture level. If it is too hot outside, she may get off her nest more often to let the eggs cool down a bit. She instinctively knows what is the correct temp and humidity to be at. During the last week of incubation a hen will stay on the nest full time and stop turning the eggs.
Not all hens have the natural instinct to hatch a clutch of eggs. They may leave the nest for too long or let the eggs get too cool. They may totally abandon the nest and leave it after a few weeks. Some breeds make better mothers than other. Silkies and cochins are the most broody breeds. Brahmas and orpingtons also make great mothers.
Leave the broody alone as much as possible. She needs to feel safe and protected. If she is stressed she can’t do her job properly. Not all clutches will hatch and not every broody hen will stay on the eggs all 21 days. Not all eggs will hatch into viable chicks. Some will die emerging from the egg and some just don’t hatch at all. A broody hen will have a better hatch rate than a typical incubator.
If all goes well the embryos and hens begin to vocalize the day before hatching. This vocalization become more frequent as the hatch gets closer. Chicks are able to identify their mother by the sounds of her clucking. They start to learn this sound while still in the egg.
The sound of peeping and tapping will give then hen a clue that the hatching is about to begin. The whole hatching process takes place under the hen. If you were watching her you would not be able to notice that anything was happening. The hen will usually stay 36 hours or longer to provide time for all of the chicks to hatch. During this time she will keep the newly hatched chicks close under her wing. She will then abandon the eggs that do not hatch (you should remove those unless you want exploding eggs).
Sometimes a hen will kill newly hatched chicks or accidentally step on them and crush them. This is rare but you may want a brooder set up just in case. Check out the perfect chick brooder.
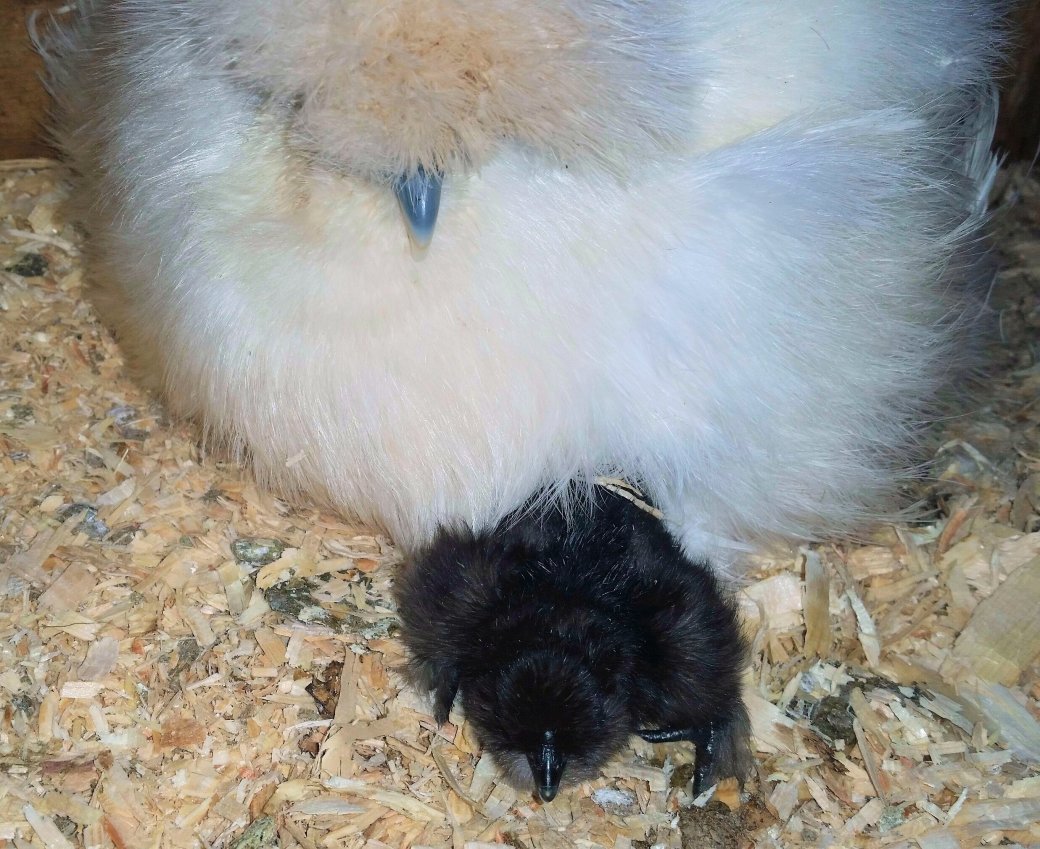
For the first ten to twelve days after hatching, chicks stay close to their mothers. The hen will be very protective of the chicks and will peck, pinch, growl or kick anyone who comes near her chicks. She keeps chicks safe from predators and teaches them life skills.
A broody hen will teach her chicks how to eat, drink and scratch for food. She will call them under her wings when danger is apparent and provide them warmth at night with her body heat.
Chicks have no resistance to diseases that are carried by healthy adult chickens who have built up immunity. The ground that has been used by adult chickens can contain parasites and disease. Coccidiosis can lead to death in young birds. Medicated chick starter and Corid can be used to help fight cocci. Learn more about coccidiosis here.
You will want to place a quart sized waterer and feeder near the mother and babies. Make sure that the waterer is chick sized and not a large gallon adult size. Vitamins, probiotics and electrolytes can be added to the water in the form of Rooster Booster.
Both hen and chicks can eat chick starter and you could also have available some chick sized grit if the chicks have access to other foods in the run. Do not feed the chicks layer food as this contains too much calcium for them.
Chicks are preorial meaning that they are capable of independent activity after birth. That’s why they can also hatch from an incubator do alright learning to eat and drink themselves by pecking at everything. Chickens are attracted to the color red which is why most chick waterers and feeders are red in color. Mother hen knows that chicks will not naturally drink water on their own which is why she will push their beaks down into the water to teach them to drink.
Mother hens and chicks use verbal commands to communicate. The hens knows the sound of her chicks and will not mistake them for other hen’s chicks. She almost constantly gives a low cluck to reassure the chicks that she is there. When she scratches in dirt revealing food, she’ll give a special higher pitched cluck to let them know that food is here. If she feels threatened or thinks her chicks are in danger or are getting too far away, the pitch and speed of her clucks rises.
As chicks become more independent they will spend less time hovering around mother hen but will continue to sleep and warm themselves under her at night. At around 12-16 weeks the hen will start to disengage with her brood. She begins pushing her chicks away and starts spending more time with the other adult hens. Soon she will be ready to start over with a new clutch of eggs.
For tips and tricks for raising outstanding silkies check out our Chicken Learning Center at VJPPoultry.com . VJP Poultry is an NPIP and state inspected hatchery located 30 miles north of St. Paul. We hatch out silkies all year long so we always have stock available. Like us on Facebook to get weekly updates on what we currently have for sale.
Victoria J. Peterson
Egg Color and Colored Earlobes in Chickens
 Chickens lay a rainbow of colors when it comes to egg shells. White, cream, tan, pink, blue, green, brown and speckled. But did you realize that a chicken’s earlobes are different colors as well, and that some people can make guesses as to what color egg a certain hen will lay based on her earlobe color.
A chicken’s ears are located on each side of its head, just below its eyes. They do not stick out like most animals do. The ears are located inside of the head. The earlobe is just below the ear. It is a slight thickening of the skin and is smooth with no feathers.
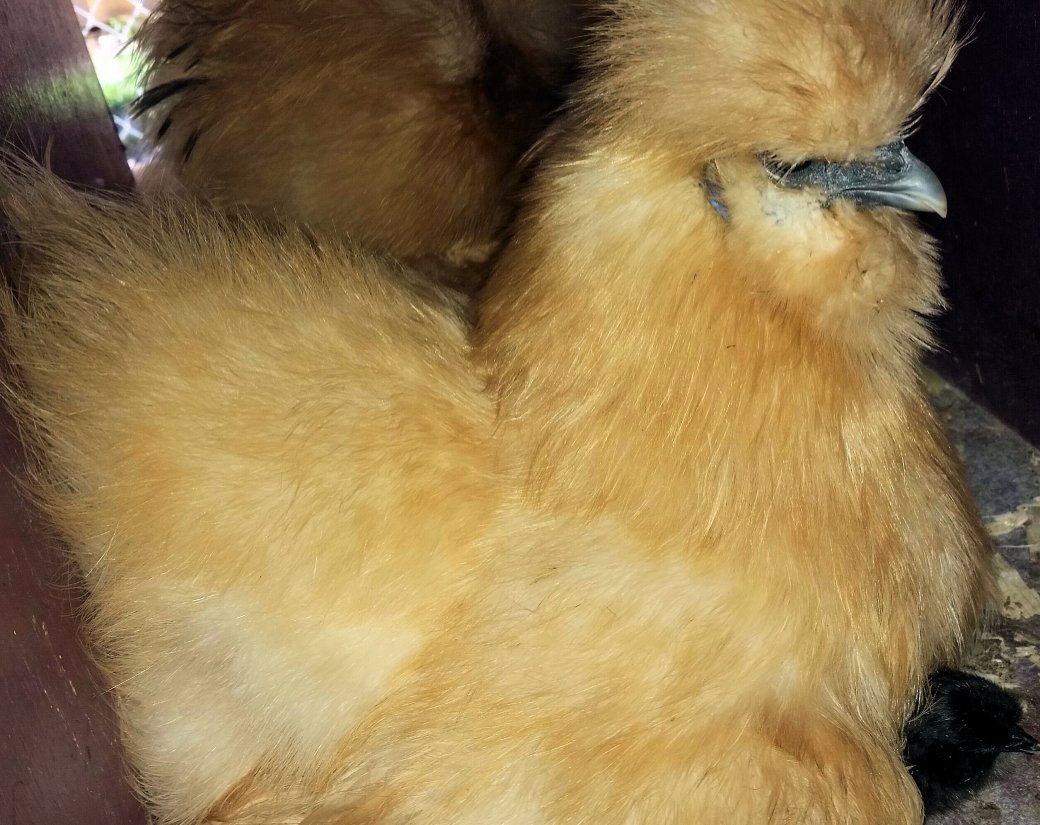
Birds are the only animal that lay colored eggs. Popular folklore says that if a chicken’s earlobes are white, they will tend to lay white eggs. If they have red earlobes they will lay brown eggs. We know that there are many exceptions to this. Some red earlobed birds lay greenish or blue eggs. Silkies have turquoise earlobes and lay a cream colored egg. Chicken breeds which have white earlobes with a pearly iridescent shine such as a cream legbar, lay blue eggs.
Eggshell color is definitely based on breed. Unless you have a mixed chicken, the birds will lay true to their breed. Araucana have red earlobes and lay blue or green eggs. Penedesencas have white earlobes and lay dark brown eggs. Some Americanas have white earlobes and lay blue eggs. Earlobe color is based on breed genetics as well. You can’t correlate earlobe color and egg shell color because one is not based on the other.
Depending on the breed, a hen will lay about 500 eggs in her lifetime. All eggs start out white. Those that are other shades have pigments deposited on them as the eggs travel through the hen’s oviduct. This journey takes about 26 hours until the egg is laid. The shell itself takes 20 hours to complete. Ameraucanas have the pigment oocyanin deposited on the egg as it travels. This pigment permeates the eggshell resulting in both the inside and the outside of the shell being blue.
Chickens that lay brown eggs deposit the pigment protoporphyrin on the eggs while they are forming their shells. This pigment only stays on the top of the shell. The inside of the shell remains white. The darkest brown eggs are from Marans.
In order to create a green colored egg, a brown pigment overlays a blue egg shell. The darker the brown pigment, the more olive color the egg will look.
No matter what color the outside of the egg is , the inside will all look similar. The color of the yolk is determined by the hen’s diet. The more green veggies in the diet, the deeper the color of the yolk.
Chickens have two ears on each side of their head. They have eardrums and an outer ear, middle ear and inner ear. They are able to harness sound waves and send them to the inner ear. Unlike humans, who experience hearing loss as they age, chickens are able to regrow damaged hearing cells. Scientists are very interested in learning more about this special adaption and in being able to apply it to help humans with hearing loss.
Hearing well is very important to all birds. It is imperative that they can hear approaching predators. Chickens can tell how far away a sound is coming from by gauging how long it takes the sound to reach the ear.
Baby chicks are able to hear their mother clucking from inside of the egg. An embryo can hear by around day 12 of their incubation period. Once hatched a chick will respond to its mother tapping on the ground when she finds food. If you tap on the food dish your baby chicks should come running.
Ear infections in chickens are often caused by bacteria entering the ear. Antibiotic drops can be given for 3 to 5 days if the infection is caused by bacteria. Clean the ear with hydrogen peroxide and a Q-tip to loosen any debris on the ear. Do not put a Q-tip deep into the chicken’s ear as it can damage it.
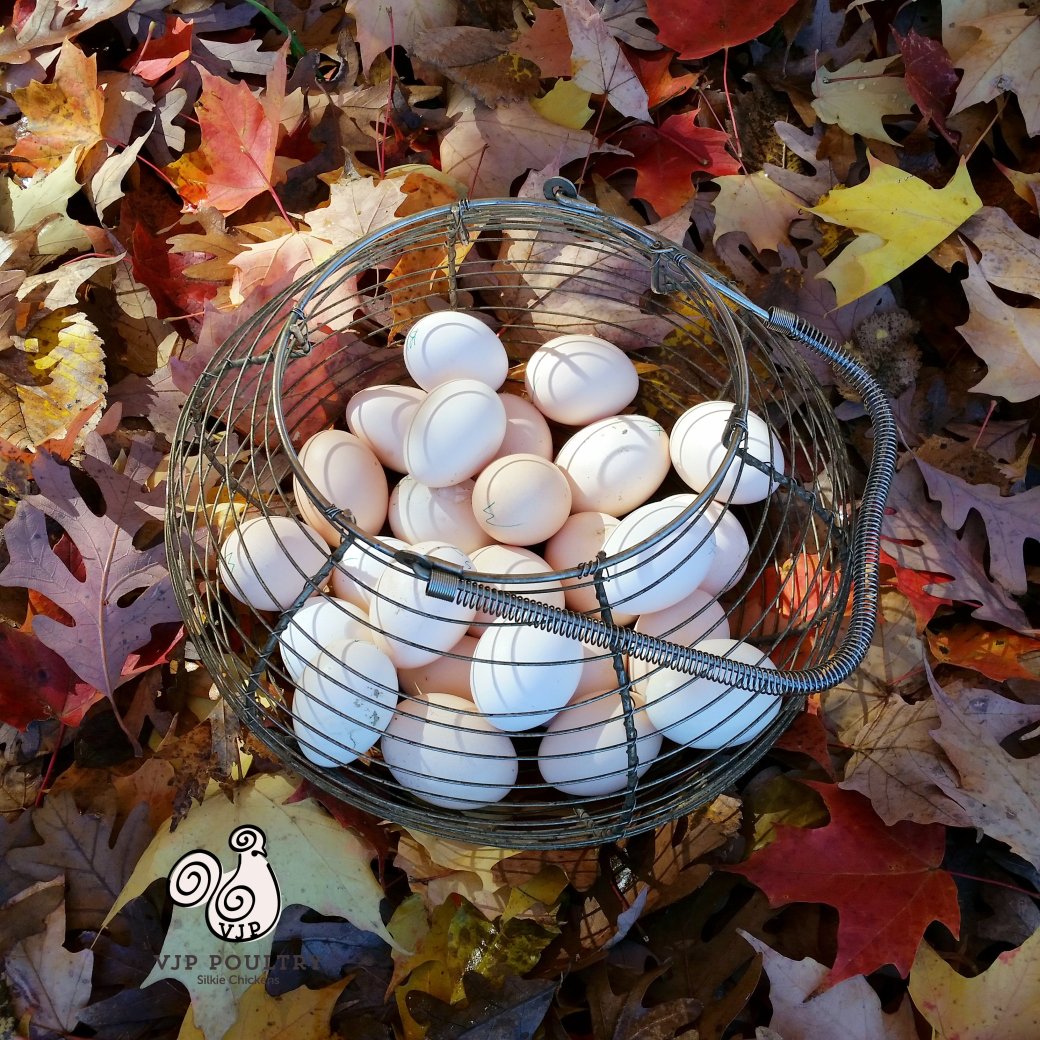
Timely egg collection is important. Don’t leave eggs under hens unless you plan on hatching. I like to use a wire egg basket to help me handle all of the eggs if find. If you are interested in more information on egg collection check out our blog.
It is fun to see the assortment and variety of egg colors that can come from your hens. You can display them quite creatively with an egg spiral holder or egg counter holder. Eggs that have not previously been refrigerated can stay on your counter for about a week and stay fresh. You can get quite fancy with your egg storage holder.
For tips and tricks for raising outstanding silkies check out our Chicken Learning Center at VJPPoultry.com . VJP Poultry is an NPIP and state inspected hatchery located 30 miles north of St. Paul. We hatch out silkies all year long so we always have stock available. Like us on Facebook to get weekly updates on what we currently have for sale.
Victoria J. Peterson
How to Prevent Pasty Butt in Baby Chicks
 Almost everyone has had a chick which has had a piece of poo sticking to its behind. We try to remove it and end up making an even bigger mess by smearing the poo around the poor chick’s backside. It ends up drying hard like cement or worse capping the vent causing a small explosion of backed up poo when finally removed. There must be a way to prevent all of this from happening again.
Pasty Butt or “pasting up”, is a condition in which the little chick’s poo gets stuck to the vent (small slit on chick’s back end) and “stops up” the chick like a cork. The chick can’t eliminate its poo and the poo gets backed up into the body of the chick. This can kill the chick fairly quickly if not removed.
If I see that a chick is plugged up, I will carefully remove the piece of poo with my fingernail. I gently tug, being careful not to hurt the chick. This works best when the poo is dried. Some feather down may come off with the poo using this method. Sometime there is too much poo and it is too wet to remove it with your fingernail. I will then use a Q-tip and warm water to soften the poo until it comes off. The disadvantage with this method is that now the chick has a wet behind and can quickly become chilled. I gently dry it off with a towel or paper towel and place it back under the heat lamp to finish drying.
Pasty Butt is common in chicks sent in the mail or in crowded feed store bins. It tends not to happen in chicks who are hatched and raised by a broody hen. Their temperature is regulated by her feathers and she will take care of making sure that their behinds are clean.
When you’ve hatched out chicks in an incubator or have had chicks arrive in the mail, you must take the place of the mother hen and clean the chicks yourself. The new baby chicks will not be able to clean themselves until they are at least a week old. They are not capable of reaching around to that spot to clean it properly. This will be your job as surrogate mother hen. You will need to check your chicks regularly for the first week of life. After the first week is finished pasty butt is less common and they are better able to keep themselves clean. Their bodies have also become better regulators of heat and their digestive system is better able to handle new food.
When checking your chicks, don’t confuse the vent with the belly button. The vent is immediately below the tail feathers. It is a thin line that opens and closes. This opening is also through which the eggs will come out of the hen’s body when she starts to lay. The belly button is between the vent and the chick’s legs. There may, perhaps, be a piece of the umbilical cord still there. Don’t pull on it as sometimes intestines can still be attached to it and you can end up pulling out the baby chicks bowels. The cord will drop off itself in a day or two.
You may wonder what causes pasty butt in the first place and why do only some chicks suffer from it. Silkies in particular seem to get it quite a bit. This may have something to do with their extra fluffy down. The poo seems to stick to it quite easily. It may help to put a dab of vaseline jelly with a Q-tip right below the vent line. The poo is then unable to stick to the down.
Temperature regulation has a lot to do with whether your chick will develop pasty butt. Too hot or too cold conditions will bring on an outbreak. Chicks that are sent in the mail often are left in cold mail rooms where they may become chilled. If mailed out in the summer they may also suffer from too warm of conditions.
250 Watt Heat lamp bulbs can often put too much heat into your small brooder. Try a smaller watt bulb or use a different heating source. I like the Ecoglow or the Sweeter Heater. They both mimic a mother hen by creating a warm cave where the chick can feel protected. I have not found them to be too warm. Radiant heat does not heat the air but does heat the chick and bedding. Watch your bird’s behavior. They will let you know if they are too hot or too cold. Chicks that are too cold will huddle up together and make loud cheeping sounds. Chicks that are too warm will spread out to the corners of your brooder to try and get away from the heat source. For the first week the brooder should be 90-95 degrees. For more information check out How to choose a Heat Source for your Brooder.
Placing the chick in stressful situations will also bring on pasty butt. Overcrowding in the brooder can bring on stress for baby chicks. Too many chicks can trample each other in their frenzy to find the best spot in the brooder, best place to get food or best place at the waterer. Stronger chicks will walk over weaker ones. Smaller chicks can get squished into corners. Keep your numbers in the brooder manageable. Newborn chicks need about six square inches of space each. They also need space in which to get away from the heat source if they need to. More information about brooder size is at Choosing the Perfect Brooder.
Other things that can cause stress are loud noises and frequent handling by over eager children. The first week of life should be a time of calmness with no major transitions. They are very cute to look at but when you sweep your hands into their brooder to scoop them up all they are thinking about are flying predators. They instinctively know that they should fear things that come from above. Try moving the brooder off the floor and onto a table where your presence is not so threatening. Keep the brooder in a quiet area. Limit your handling of the chicks during that first week. There will be plenty of time later to cuddle with your chick. Chickens do not imprint like some other birds. There is not need to try and tame them that first week.
Baby chick’s first food should be “Chick Starter” crumbles. The size of the crumbles can vary. For the first week of life I recommend grinding the chick starter up so that it resembles powder. I use a coffee grinder. I think that this is easier to digest than some of the large crumbles that are in some packages. Pasty Butt poo is sometimes very loose and runny. Oatmeal can firm it up. I take old fashioned oatmeal and grind that up in a coffee grinder and then add it to the ground up chick starter. I make a batch that is 1/4 oatmeal and 3/4 chick starter. They seem to really like it and tend to eat more food with the oatmeal in it. I will also sprinkle some chick grit (sand) on top of it, kind of like just adding a sprinkling of salt to something. This will also help to firm their poo up as well. Grit can also be offered in a separate dish.
Treats should be given very sparingly that first week. I wouldn’t give them any treats beyond ground up oatmeal, hard boiled egg yolk, or perhaps some plain yogurt. Pasty butt is often a result of the chick switching from nutrients found in their egg to the new food out in the world. Stick with the chick starter for now. There is plenty of time for treats after they are a week old and their digestive systems can better handle it.
I do add some things to their water. Probiotics and vitamins can give them a good start. Rooster Booster has both vitamins and probiotics . It can be added to water or sprinkled on feed. Probios is also a choice for adding active cultures to your chick’s gut. Gro – 2 – Max is a product that is organic and provides probiotics for your water .I also add a splash of apple cider vinegar to their water for gut health.
Be on the lookout for listless behavior. I notice that my chicks move and walk differently when they have pasty butt. They do not feel well when they are plugged up. Remember that temperature, stress and food each play a role in your chick’s health.
For tips and tricks for raising outstanding silkies check out our Chicken Learning Center at VJPPoultry.com . VJP Poultry is an NPIP and state inspected hatchery located 30 miles north of St. Paul. We hatch out silkies all year long so we always have stock available. Like us on Facebook to get weekly updates on what we currently have for sale.
Victoria J. Peterson
How to get Beetle Green Sheen in Black Chickens


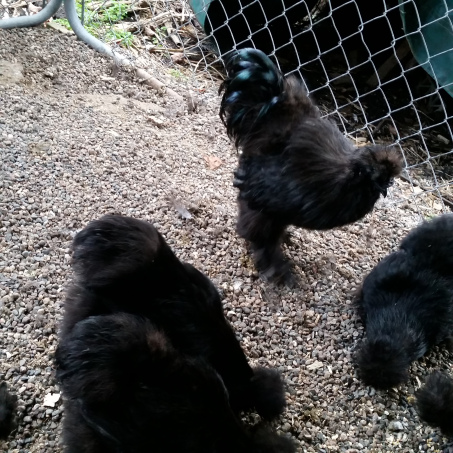
The green sheen on a black chicken is something very much desired. You find it in the tail feathers, wings, saddle and hackles of solid, deep black feathered birds. The purple sheen is not a desired trait and some will even say that it is a nutritional deficiency that causes it.
Microraptor was a very small, four winged dinosaur that lived 130 million years ago. Its feathers have been fossilized and they show black and blue hues similar to a crow. It is the earliest evidence of iridescent feather color. Microraptor was completely black with a glossy, iridescent blue sheen.
Feather color is produced in birds by arrays of pigment bearing organelles called melanosomes. Iridescence happens when the melanosomes are organized in stacked layers. This iridescence is widespread in modern birds and is frequently used in courtship displays.
In chickens, the green sheen on black is very much sought after and appears to be in part produced by the structure of the feathers and in part by the condition of the pigment in them. It is found only in chickens with good black color and in the absence of any purple barring. It can also be found in any chicken that has some black feathers such as partridge silkies.
The quality of the feather is a very important issue. A black chicken with a strong green sheen will have a much smoother feather feel to it. You should almost be able to feel how soft and conditioned that green sheen feather is when compared to duller feathers.
The amount of green sheen varies from bird to bird. Some have a lot of sheen and others don’t. Mostly it is found in roosters, but hens can have it too. I have seen some beautiful sheen on the wings and body of very dark hens. Sheen is more apparent in the sun where light can reflex off of the feathers.
Keratin is a crucial protein in bird’s feathers. The way it is structured allows light to twist and turn and separate. It allows feathers to act like a prism by scattering the longer wavelengths of light and reflecting shorter ones to give us the gorgeous blues, purples and greens.
The preen gland is a gland that is located at the base of the tail. This secreted oil helps to keep keratin flexible. This makes feathers appear more saturated with color. Most birds preen by rubbing their beak and head over the preen gland pore and then rubbing the accumulated oil over the feathers on its body.
The green color you see is due to the effect of light scattering and reflecting off the feather structure. This is called the Tyndall Effect and it creates the illusion of certain colors.
There are four basic types of feather luster. There is green, red/purple, blue and matte- the absence of any sheen. Feather sheen is a matter partly of genes and partly of feather condition.
Gold based blacks are easier to get the correct green sheen and eliminate purple sheen. Green sheen is good and purple sheen is not among chicken breeders in the United States. A dilute black will not give you the same sheen display as a pure black color. Here is an article on my adult black silkie pen and what it is like to work with the black color. That super black color is especially useful if you are working with varieties such as Paint Silkies.
If you want to breed towards improving green sheen you must selectively breed for those desired traits. Breed green to green and remove birds with the purple/red sheen from your breeding program. Have a separate coop to keep your breeding pair in; that way you can be sure of the parentage. Keep track of your breeding pens and keep careful written records of parents and the quality of their offspring. For more information check out “How to Keep a Flock History“.
The degree of iridescence seen on all feathers is a matter of condition. A healthy bird on a good diet has more vibrant colors. Excellent food and clean, safe conditions in the coop will go a long way towards bringing out the color in your birds. Good health will improve the sheen of the feathers so they better reflect the light.
Feather Fixeris a supplement feed that people often use to improve a chicken’s feathers. Any higher protein feed will help to condition feathers. Adding vitamins and electrolytes to your bird’s water will also improve its overall health as well as probiotics and Rooster Booster.
For tips and tricks for raising outstanding silkies check out our Chicken Learning Center at VJPPoultry.com . VJP Poultry is an NPIP and state inspected hatchery located 30 miles north of St. Paul. We hatch out silkies all year long so we always have stock available. Like us on Facebook to get weekly updates on what we currently have for sale.
Victoria J. Peterson