How To Prevent Chick Deaths During the First Week of Life


20170518_104519One day old chicks are so irresistibly cute when they first learn to eat, drink and move around. First time chicken owners are drawn to the sweetness of a baby chick and make rash purchases before realizing that newborns are more fragile than they think.  There is a huge difference between a chick that is one day old and a chick that is one week old.  Truth be told, a baby chick is much more apt to die in that first week than at any other time in its life.

Some don’t make it to the point of hatching out. Lethal genes or creeper genes can cause chicks to die during development. This is a genetic trait that certain breeds have. Some will make it to the hatcher and then die before hatching due to humidity and temperature issues.

When a clutch of eggs is hatched the chicks that hatch first are usually the strongest and healthiest.  They have no trouble zipping around that shell and breaking free. If the chick is a late hatcher it has been my experience that they have more trouble. They are prone to leg issues or even need to be helped out of the shell.  They tend to be stickier as well and have a harder time fluffing out.  Leg issues include straddle leg or even having a hard time standing up on their feet.  Right from the beginning you have some chicks that are just healthier and stronger than others.

Hatching out too quickly or often when being helped out of the egg, can lead to unabsorbed egg yolk. The umbilical cord can also end up hanging out. Pulling on it can cause the intestines to pull through.  Sometimes by helping it hatch you are giving life to a chick that may not end up living very long. Chicks that have a red or sore looking umbilical area should be watched for infection.

Water and food should be offered to chicks within the first 24 hours.  Hatcheries that ship chicks often rely on the fact that chicks can live off the energy from their egg  yolk for three days. Chicks will become dehydrated if not offered water and will be healthier if they start eating sooner. Shipped chicks have a higher death rate than chicks bought from local breeders or raised by a broody hen.  Some hatcheries will include Grogel to their shipping boxes to help chicks stay hydrated.

By day 3 or 4 chicks are no longer receiving energy from their yolk.  Some may begin to die after the third day.  They will close their eyes and become lethargic.  Then they die.  Losses of baby chicks almost always occur in the first two weeks of life.  A mortality rate of 1-5 percent is considered normal for a hatch.  Anything above 5 percent is abnormal.  Failure to thrive is a very real thing and young chicks often die leaving us wondering what has happened.

One of the biggest chick management factors for early death has to do with brooder temperature.  Most people use a heat lamp and bulb for small groups of chicks.  You adjust the temperature by raising and lowering the heat lamp over the brooder. Often the brooder ends up being much too hot.  Too high of temperature can lead to dehydration. The body of a young chick is 70 percent water. A water loss of 10 percent will cause death.  Pasting up, which is poo that sticks and covers the chick’s vent, is often due to too high of temperature in the brooder.  Many chick deaths occur because their vents have become plugged up with dried poo and they can no longer eliminate.

Low brooder temperature can also lead to deaths in young chicks.  If they are too cool, they can become chilled and develop pneumonia. Chicks that huddle together can ultimately smother the weaker ones. Pasting up can also be caused by too cool of temperatures. Chicks will let you know they are too cold by huddling under the lamp and making very loud cheeping noises.  Too hot and they will gather in the corners, panting and lying down. Transitioning from too warm to too cold back and forth is also a cause of pasting up and ill health.  Any transition can cause stress which can lead to death.

I recommend something with radiant heat like a sweeter heater  or an ecoglow as a heat source. The radiant heat is safer than a heat lamp bulb and will give a constant temperature.  For more information check out Brooder Heat Sources.  Make sure that you adjust  the brooder temperature 24 hours before introducing chicks to it. We like to use a temperature gun for accurate readings.

The food and water you choose to give your chicks can also lead to early mortality. Chick starter that is old and has started to get moldy can cause death. Check for a date on the bag. Chick starter can often come in pieces too large for a newborn chick which could cause them to choke. I like to take my chick starter crumble and grind it up even smaller in a coffee grinder. I feel that this helps with digestion and with pasting up as well.  Do not give newborns a lot of other foods besides the chick starter. Treats should not be given until they are over one week old.  Anything besides chick starter, yogurt or scrambled eggs needs grit (sand) in order to grind it in their crop.

Water that is too salty can lead to early death.  I like to add Rooster Booster with vitamins, electrolytes and probiotics to my water. I also add apple cider vinegar with the mother as well to the water.  Make sure that you have your feeders and waterers up as high as the backs of your chicks. The chicks tend to kick shavings and poo into them which can plug up the waterers and contaminate the water. Change water daily and clean and sanitize feeders and waterers weekly.

You may need to show your young chicks how to drink.  Mother hen usually gently pushes their beaks into the water and you can do the same. If you pick up a chick and it feels much lighter than the other chicks, it has probably not learned how to eat or drink yet.  I will dip their beaks into the water first and then dip them into their feed so that the chick crumble sticks to their beaks.

Make sure that there is adequate air ventilation in and around your brooder. Toxic gasses such as ammonia, carbon monoxide and carbon dioxide can kill small chicks if they are exposed to them.  Chicks require a minimum 100 percent air exchange six times in a 24 four period. This should not be a cold draft but continuous movement of air in the brooder.  A plastic tub with high sides does not have a lot of air movement allowed.  One problem encountered with poor air movement is sinusitis. This is caused by excess humidity and ammonia released from chicken poo. Remove damp bedding which causes pathogenic micro organisms  to multiply  and large clumps of poo in the brooder and spread a thin layer of bedding on top of the old. Once a week change out the bedding and sanitize the brooder with something like Oxivir.

Construct your brooder to keep out predators.  A screen should lay over the top to keep out insects, vermin, dogs and cats.  If you have small children who like to handle the chicks make sure that they are supervised.  Newborn chicks can jump out of your hands. Injuries caused by crushing or squeezing too hard are a very real problem with little ones. I would keep handling of chicks less than a week old to a minimum. Any injuries can lead to infection and should be treated with Vetericyn spray.

Avoid having too many chicks in a brooder. Overcrowding is one of the number one causes for early death.  Trampling, starvation and damp litter are caused by overcrowding.  Chicks with vaults like silkies or polish need to be especially careful with having too many pen mates. A well placed peck to the head will result in death. Any drop of blood or open bare spot is an invitation for the other chicks to peck at it. Loss of down caused by pasting up attracts others in the pen to continue to peck at it until bleeding occurs. Separation is sometimes necessary.

Practice biosecurity around your brooder. Wear gloves around your adult chickens and wash your hands before handling the newborns. Wear different shoes or boots around your adults than you do around your brooder.  Newborns do not have well developed immune systems.  You will be bringing in germs and diseases on the bottoms of your feet. You may also bring in mites from the outside coop.  Young chicks are very prone to an attack by mites which will result in death if not dealt with. I use the powder very sparingly if I think that they have been exposed.

Light is important in your brooder.  Chick activity is greatest in bright light. They need to be able to see the food and water. Lights should be low or off at night. If you use a heat lamp bulb, choose one with an infrared coating. This helps with pecking and at night can help simulate darkness.

Coccidiosis can be a killer during the first week of life. Because of possible exposure to the disease people will use medicated chick starter.  I would only use it if you think that your chicks are being exposed. If they are inside and you practice good brooder hygiene you probably won’t need to worry. Medicated feed can rob your chick of some vitamins.

Some items to have on hand just in case of a problem would be Save-a-chick, which goes into their water and provides electrolytes.  There is also one which adds probioticsNutridrench can give a boost to a lethargic chick but read directions for use with young birds.

Chicks under one week old are very fragile. If at all possible try and purchase birds over one week old. They are stronger and sturdier and have a much better chance of survival.  They know how to eat and drink and the pasting up usually ends after the first week.

For tips and tricks for raising outstanding silkies check out our Chicken Learning Center at VJPPoultry.com .  VJP Poultry is an NPIP and state inspected hatchery located 30 miles north of St. Paul.  We hatch out silkies all year long so we always have stock available.  Like us on Facebook to get weekly updates on what we currently have for sale.

Victoria J. Peterson

20180522_103733-1


A Look at the Silkie Standard of Perfection

20171020_121935-1The American Standard of Perfection is a wonderful book published by the American Poultry Association. In it you will find all kinds of valuable information on all of the breeds of chickens that are recognized by this group.  Their main purpose is to list characteristics of each breed at their highest level.  This information is used by judges to help them judge the qualities of individual birds against what has been decided as the “perfect” bird of that breed and variety by the American Poultry Association. It is also used by breeders to improve their birds through breeding towards the standard and by exhibitors who want to place well in poultry shows who use the standard as a guide for choosing birds.

In judging, there is a scale of points that equals 100.  Points are assigned to different attributes of the bird.  Points will be deducted if the bird does not meet the standard given.  There are also disqualifications that can be given which will eliminate a bird from competition.  Since silkies  have crests and beards their point system is adjusted to include points for those areas.

The disqualifications specifically for silkies include :  Bright red comb, face and wattles.  Shanks not feathered down outer sides.  Feathers not truly silky (except in primaries, secondaries, leg, toe and main tail feathers.) Vulture hocks. There are other disqualifications that are for all birds, not just silkies.  You would find those under “General Disqualifications” elsewhere in the book.

The standard weight for a silkie cock is 36 oz.  The standard weight for a silkie hen is 32 oz.  The standard weight for a silkie cockerel is 32 oz.  The standard weight for a silkie pullet is 28 oz.

The standard then lists descriptions of each of the areas of the silkie’s appearance.  This is all part of the bird’s shape.  It is best to obtain a copy of the standard so that you can read in detail what the standard entails. I will mention a few of the items of interest but there is much more information listed in the book. I will be discussing the Bearded Silkie only.

The comb should be walnut shaped. In the males it should be circular shaped and have a horizontal indentation across the middle of it. Females should also be walnut and smaller. The wattles should be small and concealed by the beard in bearded silkie males.  The females should be very small and concealed.

The crest should be medium sized. The beard and muffs should be thick and full. The neck should be short and gracefully curved.  The back should be short and broad and rising back in a curve towards the tail.  The cushion of the tail should be broad and round and very fluffy.  The tail should be  shredded at the ends.

The wings should be closely folded and carried well back being nearly horizontal.  Primaries should be concealed  by secondaries.  The tips should be well shredded with tips being concealed by saddle feathers.

The silkie needs to have five toes. Three in the front and two in the back.  One toe in the natural position and the other placed above it curving upwards and backwards.  Feathering should be to the middle toe.

Comb should be deep mulberry colored.  Beak should be slaty blue and eyes should be black.  Earlobes should be turquoise blue. Skin should be dark blue and toes slaty blue.

Silkie’s feathers come in different colors and not all colors are recognized by the APA. Here are the ones that are recognized: white, black, blue, partridge, buff, gray, splash, self-blue (lavender) and paint.  There are separate descriptions for each of the different color varieties indicating what is accepted and what is not.

Symmetry, as well as, condition and vigor are also important in judging.  The overall shape and balance of the bird is important.  The silkie should look like a “S” curve with the bottom part of the “s” continuing upward.  They almost look completely circular, like a bowling ball when they stand correctly.

There is much more to the silkie standard than I have talked about in this article.  If you would like to purchase a copy, you can get one through the American Poultry Association here.

There are also old copies and  knockoff copies at Amazon that are not printed through the APA.  I think that they are basically  xerox copies and have the same information.

Hopefully this will answer some of your questions concerning what the standard of perfection is.  As a breeder, we are constantly trying to improve our silkies and have them come as close as possible to the standard that has been set. It is important to show your birds as a breeder or attend shows so that you can talk with judges and other people who are knowledgeable about silkies.

For tips and tricks for raising outstanding silkies check out our Chicken Learning Center at VJPPoultry.com .  VJP Poultry is an NPIP and state inspected hatchery located 30 miles north of St. Paul.  We hatch out silkies all year long so we always have stock available.  Like us on Facebook to get weekly updates on what we currently have for sale.

Victoria J. Peterson

Information for this article was taken from The American Standard of Perfection 2010 published by American Poultry Association, Inc.

20171126_125635-1


How To Integrate New Chickens Into Your Flock

20161106_123815
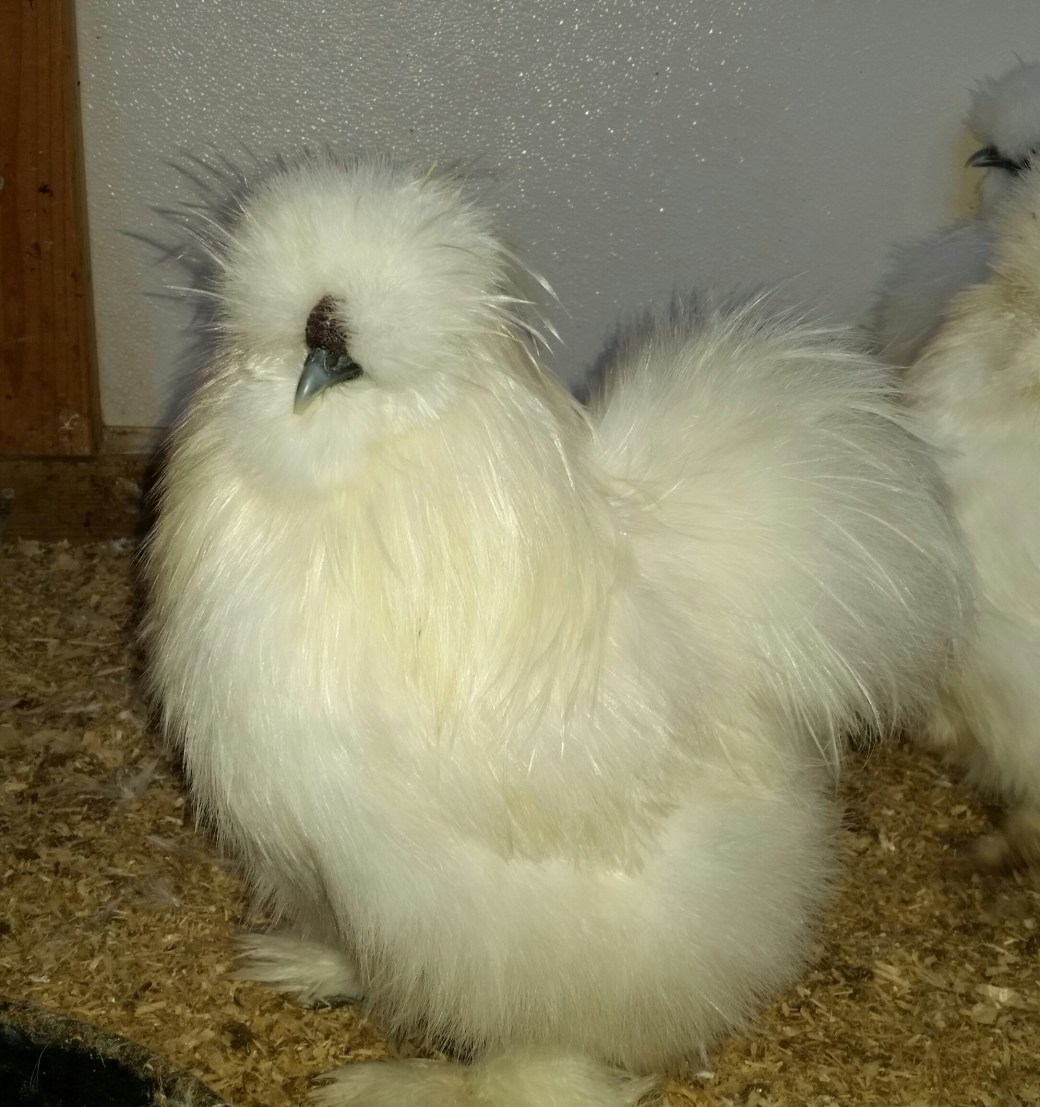
Chicken Math is a very real thing.  We enjoy adopting new members to our flock and we want it to go as smoothly as possible.  Every year new birds are added and older birds are replaced or die off naturally.  A hen may chose to raise a clutch of chicks or new breeds catch our eye and we then must figure a way to incorporate these new birds into the standing social order.

Chickens are very social animals.  There is an order of dominance or what is called a “pecking order.”  The correct  integration of new birds is important.  You need to manage the pecking order so that new birds and chicks do not get hurt and the original flock does not become overly stressed.

When you first acquire new adult birds, they will need to be quarantined before you can mix them in with your home flock.  This is for the safety of your flock.  Do not quarantine them in the same area as your current birds.  Have a separate pen or crate away from the others.  They will need a place they can stay for thirty days.  You do not need to quarantine chicks that you buy from a hatchery as these are not exposed to an adult flock that may contain germs.

Each flock of chickens has their own germs that make them immune to certain things in their environment.  A new bird will not have that immunity.  This would  be a good time to give it some probiotics or Rooster Booster to help supplement its immune system.  A feed with extra protein will help it deal with the stress of being in a new place.

The new adult bird may also have some hidden issues.  Check for lice, mites, breathing problems or discharge from the eyes or nostrils.  A little poultry dust in case of mites or apple cider vinegar in the water for general health wouldn’t hurt.  Disease can take up to a month to show itself in a healthy bird.  Make sure that you practice biosecurity  and wash your hands when handling new birds.

It is best to introduce new birds in pairs or more. Do not buy a single bird and expect it to smoothly be accepted by the others.  Being alone and new is a double disadvantage.  If there is more than one bird introduced at the same time , they will then have a buddy to hang out with.  There is also more than one bird to take all of the pecks that will be directed their way.

Always add birds of a similar size to the flock. Larger breeds are always more dominant and will bully the smaller breeds. If you have a flock of Jersey Giants it would be difficult for a small bantam to be accepted.  Try to wait as long as possible to introduce young birds.  They should be done making baby noises and be as fully feathered out as possible.

The first step is to separate them in the coops and outside runs.  The idea is to keep them separate but visible to each other.  Seeing but no touching each other. They may try to fight through the fence but they can’t hurt each other.  Poultry netting is a good way to separate them.  Even just a dog crate sitting in the run will work.  Do this for a few days to a week.

When it is time to actually put the birds together there is a few ways you can do it.  Some people think that the best time to do it is at night after they have gone to bed.  Stick the new ones on the roost and they will all wake up together the next morning and may be more accepting.

Another method is to do a free range situation.  Let the new birds out to free range first.  Then let the rest of the flock out.  There is plenty of room for the new birds to run and hide or just plain get away from any unwanted pecks.

If you don’t let your birds free range, you can put the new birds in the run first and then let the older flock out. By letting the new birds out first, they can find out where the food and water is first. Distract the flock with treats so they won’t be so focused on the new chickens.  Make sure that you have multiple feeding dishes and watering stations.  The older flock may try and block the new birds from eating and drinking.

Make sure that they have plenty of room.  Overcrowding will stress everyone out and make the older birds resentful.  Put out more food and treats than they actually need.  Flock blocks can be helpful.  Hiding places are also important.  Just placing a piece of wood against a wall can provide a hiding place for a scared bird.

I know that it is hard, but the less interference from humans the better.  Unless there is blood it is best to let them work it out themselves.  If a bird is super aggressive towards a new one, put it in a dog kennel for a few days.  When it comes out, it will become a “new” bird and be taken down a peg or two.

Two or more roosters will not get along unless they are raised together and are not where they can see hens.  Ten hens per rooster is the recommended amount.  Don’t introduce a new adult rooster to a flock that already has a rooster. They will fight for dominance.

After you have introduced new birds, watch to make sure that they are eating and drinking.  Give them plenty of places to hide behind.  Put everyone on the same food and have separate dishes of oyster shell.

The introduction of new birds can cause your old flock to stop egg production for awhile until things settle down.  It will take a few weeks but soon everyone will have a new place in the pecking order.

For tips and tricks for raising outstanding silkies check out our Chicken Learning Center at VJPPoultry.com .  VJP Poultry is an NPIP and state inspected hatchery located 30 miles north of St. Paul.  We hatch out silkies all year long so we always have stock available.  Like us on Facebook to get weekly updates on what we currently have for sale.

Victoria J. Peterson

20180413_125506-1

Silkie Wings – What makes Show Quality?

20180222_161805
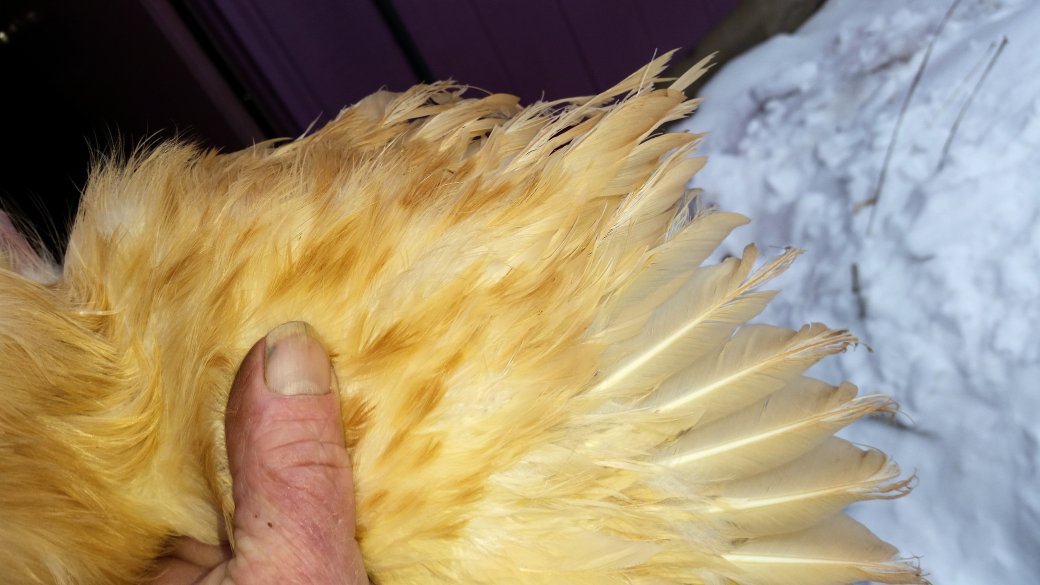
There has been lots of discussion about the difference between a show quality silkie and a pet quality silkie. Some of that has to do with their wings. I am going to talk about a few different problems that the silkie breed is known to have difficulties with as far as wings are concerned.

First of all, what is a perfect wing on a chicken?  The wings should be well formed when the wing is opened out.  You may see judges at a poultry show opening and shutting a bird’s wing.  You need to open the wing and stretch it out so you can see from one end to the other and look at every individual feather.  The formation should be perfect and easy to fan out. There should be no gaps showing and the feathers should form an arc.  When there is an open space between the primaries and the secondaries when the wing is opened, the defect is called a split wing.

There are ten primary feathers and ten secondary feathers. There should be no gap between them. There is also a small axle feather between the primaries and the secondaries.

The wing muscle should also be sufficiently strong enough to fold the wing back correctly and firmly.  The primary feathers should tuck under the secondary feathers and be held tightly to the body and into the cushion.  They should be held horizontally and not droop. The wing should be flat against the body and not stick out.

The entire body of the silkie should be covered in abundant fluff and the wings should be ragged, almost shredded or tattered looking.   Ideally, they should be shredded one third up the primary feathers.  No hard looking feathers should be visible.

20180222_162617-1

There are three main faults that can be seen in silkie wings.  Split wing is where the feathers have a gap between the primary and secondary feathers or at the top of the wing between the primaries.  You will always know when a wing is split as the wing feels weak and has a lot of give when handling it.  Both sets of feathers should be level. With split wing on set of feathers will be longer than the other.


Slipped wing is when the wing does not return to its natural folded position when opened. The primary feathers may overlap in reverse order or there is a tendency for the primary feathers to be held outside the secondaries when the wing is closed.  The primaries should tuck under the secondaries but instead the reverse happens. The primary feathers show from the outside and may even be twisted.   Angel wing is slang for slipped wing in chickens.  Actual Angel wing is found in water fowl.

Twisted feather is when a feather is in the slipped wing position but is turned upside down so that you are seeing the bottom side of the feather.

All three of these conditions are considered disqualifications in the show ring.  When assessing for faults in your bird make sure that you are not looking at it if it is heading into its annual molt.  The best age to be checking is the thirty week mark.  By this point the bird will be mature enough and is not usually going through a molt. You can begin to look at wings earlier at three to four months as most birds have fully feathered out by then to start getting an idea of what you want to save for poultry showing.

An APA standard is a valuable book to own. It gives you complete descriptions of what is correct for all breeds of chickens when you are showing. It also will let you know what is a disqualification or a fault. There is also the Bantam Standard which is also quite good.  Silkies are classified as bantams.

You should try and breed your best to your best.  These wing defects are a recessive trait and can be passed down.  Choose wisely and create breeding pens with your best hens and rooster.  A separate pen from the rest of your birds allows you plenty of room for your breeding program.  This article on “Selective Silkie Breeding” will give you some ideas on how to set a program up.

For tips and tricks for raising outstanding silkies check out our Chicken Learning Center at VJPPoultry.com .  VJP Poultry is an NPIP and state inspected hatchery located 30 miles north of St. Paul.  We hatch out silkies all year long so we always have stock available.  Like us on Facebook to get weekly updates on what we currently have for sale.

Victoria J. Peterson


What To Expect at a Poultry Show

20171028_135827     
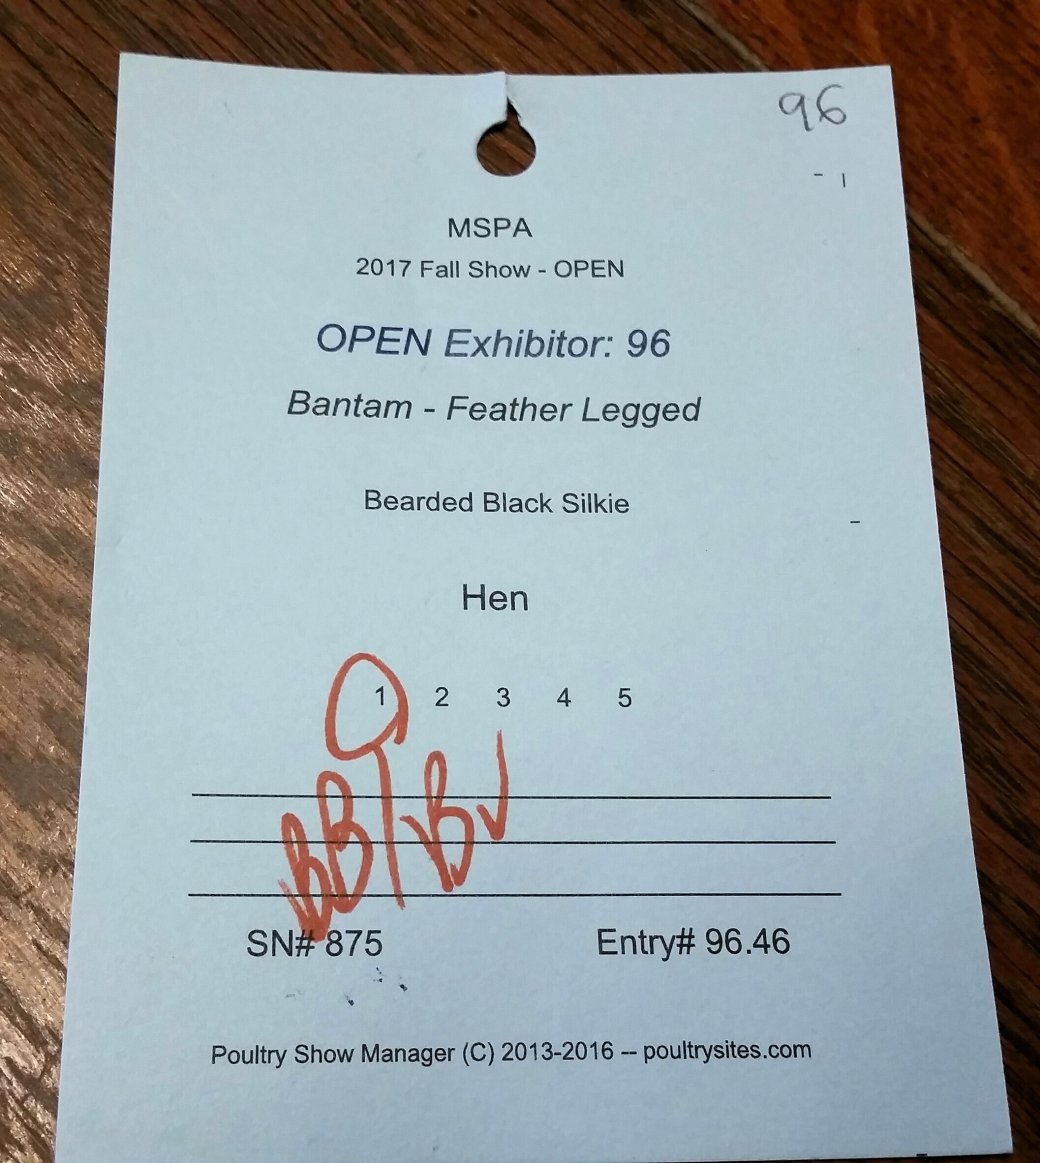
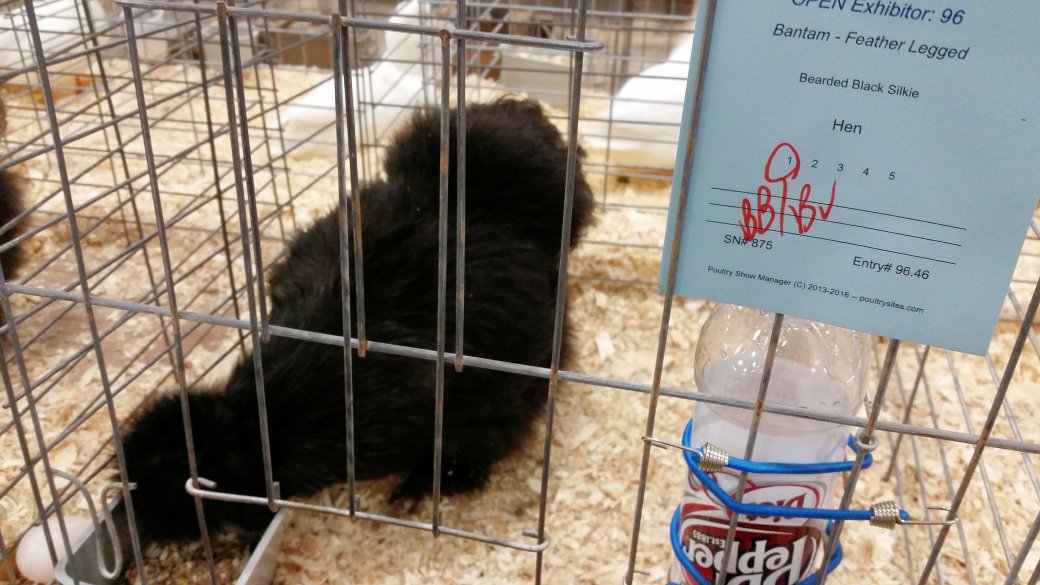
A poultry show is usually a three day event. The first day is spent “cooping-in”. This is when you arrive and place your birds in their show cages. The second day is when the judging takes place and other events.  The third day is very short and it is known as “cooping-out” or cleaning up and taking your birds back home.

Leading up to this event you will have sent in your entry form to the organization that is hosting the show.  You will need to declare how many birds you are entering in each breed and whether they are pullets, hens, cockerels or cocks.  Pullets are females up to one year of age.  Cockerels are males that are up to one year of age.  Cocks are male roosters over one year old.  There is a small fee for each bird that you enter.  You will also need to have each bird pullorum tested and have that paperwork sent in along with your entry form.  There will be a cut off date for getting your entry forms completed and mailed in.

Leading up to the show,  you will need to keep your bird in condition with high protein food.  Practice handling and cage training your bird.  A week before the show you will need to clip toenails, beaks and bathe your bird. You may also want to do some reading on primping your bird for the show.

Friday evening is coop-in time.  You will need to to load your birds into your car or trailer. Use poultry carriers or cat carriers to transport your birds.  One bird per carrier space is preferred so that they do not poo on each other’s feathers.

When you arrive you will check in and locate where your show cages are. They will not all be together, especially if you are bringing more than one breed of poultry.  These show cages are very small.  There will be some pine shavings already in the cage, but you can bring your own from home to add to it.   Set up your feeders and waterers.  If you are showing silkies, you will want the pop bottle waterer.  I use mini bungee cords to secure the waterers instead of the springs that come with them.   I bring jugs of water from my own home that has electrolytes added to it.

In my cage cups I put a wild bird seed mixture. This will help to keep their poo firmer and not make such as mess in their cages.  Each cage has a card attached to it. Read the card carefully.  It will say the breed, color (variety) and sex of the bird that should go into that cage.  If the information is not correct then you need to find someone in charge and get it corrected.

You can then start to unload your birds from their carriers and into their show cages.  As I do this, I carefully wipe clean their feet with baby wipes or citrus hand cleaner.  Look around to see where the outlets are located in the building. You will need to be able plug in your hair dryer in the morning.  I also put a little Vet Rx on the comb to help their immune system since they are in a new environment.

You can zip tie or lock your cage before you leave, but understand that the zip ties and locks must be off before the judge can inspect your bird.  Then it’s off for a good night’s sleep and an early start the next day.

On Saturday morning you will want to arrive as soon as the doors are open.  Check your birds for water and then remove the food from their cage until judging is over.  You do not want your bird to have a full crop when it is being judges.  Then get out your showbox supplies and plug in your hair dryer.  Carefully check each bird for messy feet or feathers and try to clean it with a baby wipe.  If it is a larger mess, use Cowboy Magic or Citrus hand cleaner.

After they are cleaned up, I spray a cloth with Show Sheen and rub it all over the bird.  I use the hair dryer to dry the show sheen and fluff up the silkie feathers.  Use a slicker brush or a fine tooth comb to tease and back comb the fail feathers to make it look as fluffy as possible.  When satisfied with the look of the bird, put it back in the cage and await judging.

Keep your cage as clean as possible and remove any poo or eggs as they come.  You are not allowed in the judging aisle while the judge is there.  I do like to observe from several aisles over white the judge is going over my birds. It helps me to understand my scoring card later.

20171103_161151-1

Learn to read a cage tag and interpret the judges markings prior to your arrival. The birds are first judged against others that are the same color, sex and age.  For example, all the white silkie pullets are judged against each other.  They will be given a ranking or 1, 2, 3, 4, 5 for the top five birds in this group.  This is written or circled on the card.  Then they will judge all the white hens, then all the white cockerels etc. until all of the white have been ranked.  Then the judge will award BV (Best Variety) and RV (Reserve Variety).  This is like first and second place.  All of the other colors (varieties) in the breed are judged this way.  When that is completed the judge will then decide BB (Best of Breed) and RB (Reserve best of Breed).  This is based on all the colors (varieties) that are represented by the breed.  The Best of Breed silkie is then judged against other winners that are in the Feather Legged category.  Again, that winner will go to Champion Row and then compete for Best Bantam and Reserve.  The winner of Best Bantam goes on to compete for Super Grand Champion of the show against the Grand Champion Large Fowl and Grand Champion waterfowl.

The judge will often write comments on the cards such as “nice” or “wing?”.  What you don’t want to see is a DQ (disqualification) or a blank card with nothing written on it.  You will need to find the judge later when they are finished to ask them questions about what was written or why they judged the way they did.

There are other things to do besides watching the judging.  Jr. Showmanship will be taking place. It is always fun to watch the kids answer questions about their birds.  There will be auctions and raffles to participate in.  Vendors are often there so you can look at all the new chicken supplies.

Outside you will find many people selling birds from their cars or from specially marked areas.  Food will be for sale as well as a special banquet at night where awards are often given out.

Sunday morning is coop-out time.  Awards will be given at that time as well.  Make sure that you do not remove your birds until the coop out announcement is made.  Then it is a mad dash to quickly take down your food and waterers and load your birds back up in their carriers for the trip home.  Before the bird goes in the carrier make sure that you give it a quick spray of Adams Flea and Tick in case they picked anything up at the show.

The best thing about any poultry show is the time that you get to spend with other chicken people.  You will see old friends and make some new ones.  You will get the chance to talk chicken to your hearts content with other like minded people.  Plans will be made to meet next year again at the show.

For tips and tricks for raising outstanding silkies check out our Chicken Learning Center at VJPPoultry.com .  VJP Poultry is an NPIP and state inspected hatchery located 30 miles north of St. Paul.  We hatch out silkies all year long so we always have stock available.  Like us on Facebook to get weekly updates on what we currently have for sale.

Victoria J. Peterson

20171028_141125