Tag: silkie blogger
The Perfect Chick Brooder
 A brood is a group of chicks that are hatched or cared for at one time such as a hen with her brood of chicks. A brooder is a place where a young chick can be kept safe and warm. It takes the place of the mother hen but still can provide warmth and protection. Even if you always use a broody hen for your hatches, it is good idea to have one available for emergencies.
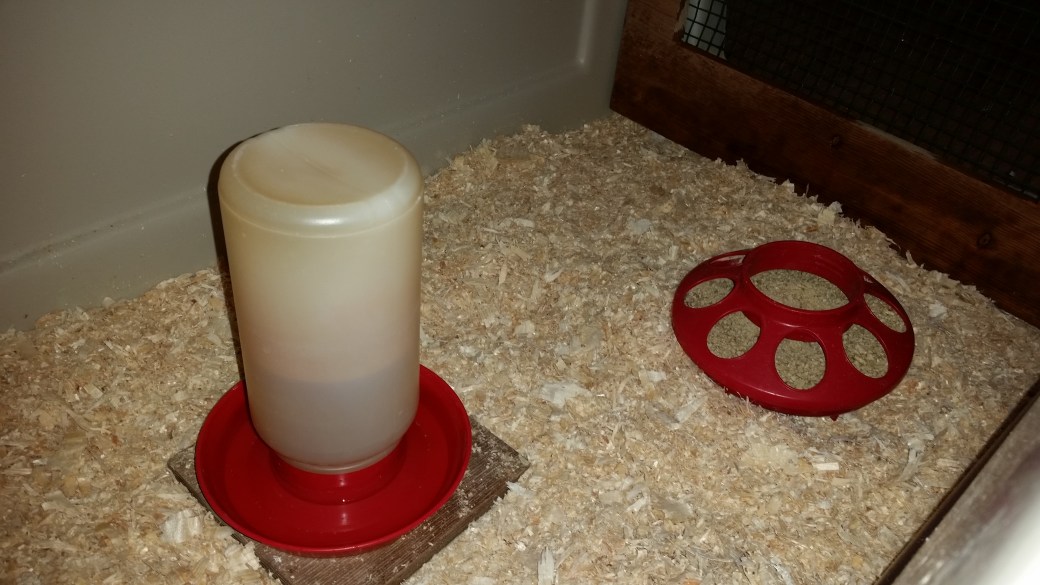
This article is going to concentrate on the brooder box itself. The box is an important starting point. The dishes, food, bedding and heat lamp are all added after the box is chosen. There is an abundance of options out there for brooders.
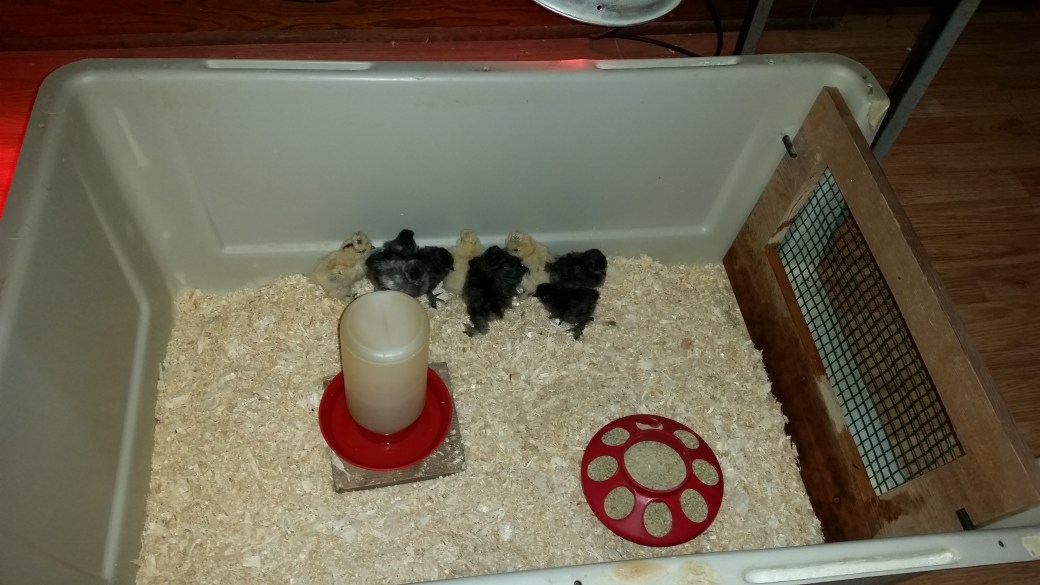
The basic brooder can be made out of many different kinds of materials such as plastic, metal, wood or cardboard. You can buy a ready made brooder or you can make one yourself out of a cardboard box or plastic tote. I prefer plastic because it is easy to clean and you can use it for multiple hatches. Cardboard falls apart when it gets wet and damp conditions are not healthy for the chicks. Heat lamp use with cardboard and pine shavings can be a fire hazard unless you are extremely careful with mounting the heat lamp.
There are some wonderful brooders available. A brooder box or a rabbit hutchcan make a very sturdy brooder. Some people use a wading pool or even a dog carrier. Whatever works for you. Your choice will have to do with what time of year it is and whether the chicks will be inside or outside. If outside, you will need to protect both the brooder and the chicks from the elements.
Folding play pens also can make great brooders. Remember that protection from the outside world is very important. The sides should be high enough so that the chicks do not jump out and that other pets cannot get in. Twelve inches high is a nice height. You will also need some kind of a top. I just place a window screen on top that can be easily removed and can allow for maximum ventilation. A larger screen can be used with larger brooders.
The size of your brooder will depend on how many chicks you are brooding. Newborns up to 4 weeks old need around 1/4 square foot per chick. Five weeks and up will need around 1/2 square foot per chick. Bantam breeds will not need as much space as they are smaller. It is better to buy a larger brooder and then use dividers to make it smaller for newborns. A smaller space allows for a warmer area for newborns.
There are several home brooder kits that allow you to change the size of your area. Some brooders come with stands for the heat lamp and other kits have even more extra equipment included.
Chicks stay in their brooder until they are feathered out (have lost their baby down and now have actual feathers). I brood mine until they are ready to move outside at about 10 weeks. Ten week old birds will not fit into their baby chick brooders. As your chicks grow, you will need to find larger brooders or set up a brooder situation inside of their outdoor coop.
If you plan on brooding chicks every year then I would suggest something that is going to last and is easy to clean. I have had the most success with plastic tote brooders or brooders made from large plastic dog carriers. I use the plastic totes for the newborns and the dog carriers for larger chicks. The clean up very easily. Ventilation is important but brooders should not be drafty especially for newborns. If you need advice about how to heat your brooder check out “How to choose a heat source for your Brooder“. For information on taking care of newborn chicks check out “Silkie Chick Management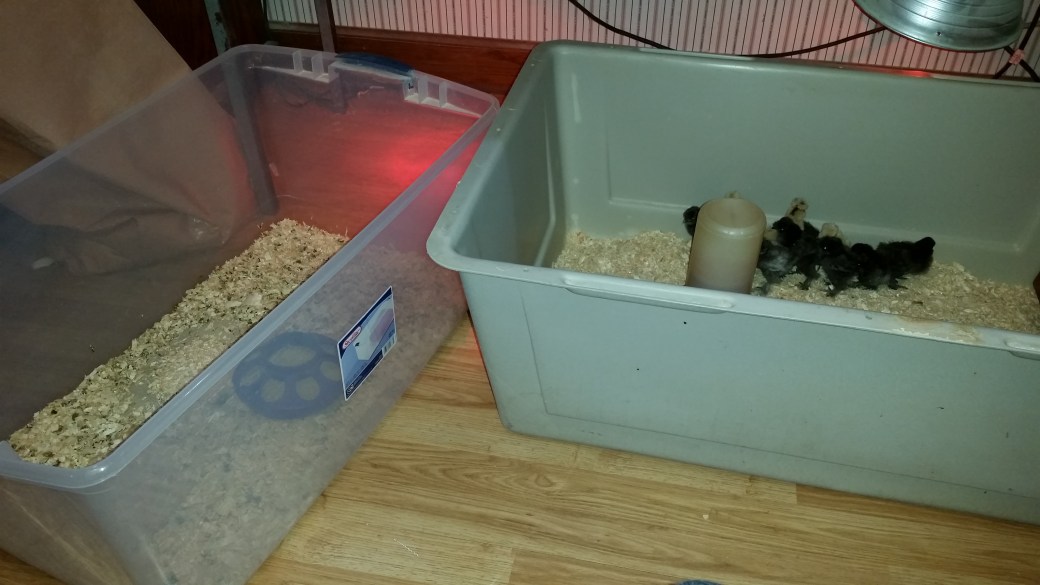 “.
“.
For tips and tricks for raising outstanding silkies check out our Chicken Learning Center at VJPPoultry.com . VJP Poultry is an NPIP and state inspected hatchery located 30 miles north of St. Paul. We hatch out silkies all year long so we always have stock available. Like us on Facebook to get weekly updates on what we currently have for sale.
Victoria J. Peterson
Silkie Wings – What makes Show Quality?
 There has been lots of discussion about the difference between a show quality silkie and a pet quality silkie. Some of that has to do with their wings. I am going to talk about a few different problems that the silkie breed is known to have difficulties with as far as wings are concerned.
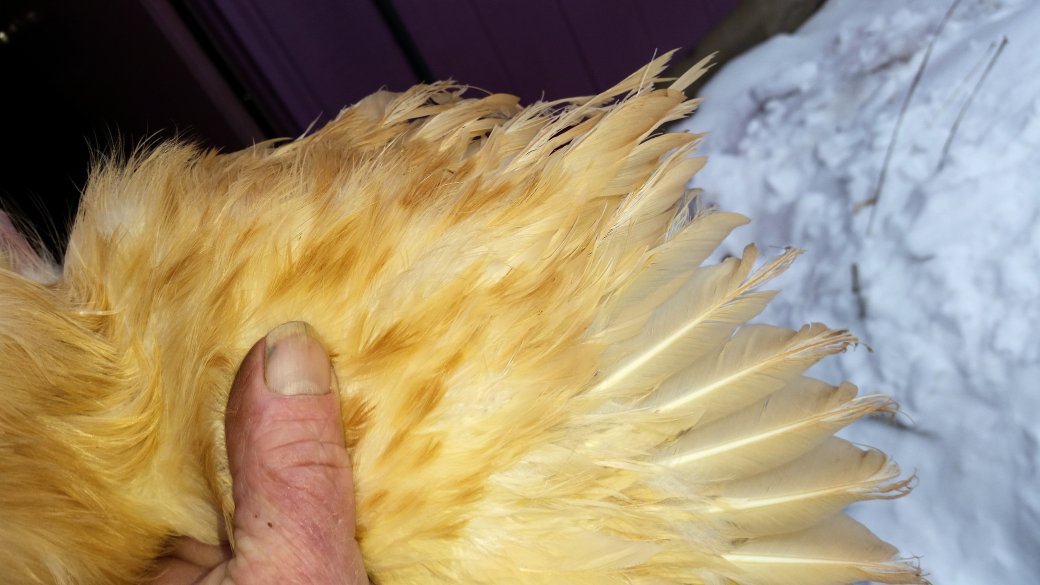
First of all, what is a perfect wing on a chicken? The wings should be well formed when the wing is opened out. You may see judges at a poultry show opening and shutting a bird’s wing. You need to open the wing and stretch it out so you can see from one end to the other and look at every individual feather. The formation should be perfect and easy to fan out. There should be no gaps showing and the feathers should form an arc. When there is an open space between the primaries and the secondaries when the wing is opened, the defect is called a split wing.
There are ten primary feathers and ten secondary feathers. There should be no gap between them. There is also a small axle feather between the primaries and the secondaries.
The wing muscle should also be sufficiently strong enough to fold the wing back correctly and firmly. The primary feathers should tuck under the secondary feathers and be held tightly to the body and into the cushion. They should be held horizontally and not droop. The wing should be flat against the body and not stick out.
The entire body of the silkie should be covered in abundant fluff and the wings should be ragged, almost shredded or tattered looking. Ideally, they should be shredded one third up the primary feathers. No hard looking feathers should be visible.

There are three main faults that can be seen in silkie wings. Split wing is where the feathers have a gap between the primary and secondary feathers or at the top of the wing between the primaries. You will always know when a wing is split as the wing feels weak and has a lot of give when handling it. Both sets of feathers should be level. With split wing on set of feathers will be longer than the other.
Slipped wing is when the wing does not return to its natural folded position when opened. The primary feathers may overlap in reverse order or there is a tendency for the primary feathers to be held outside the secondaries when the wing is closed. The primaries should tuck under the secondaries but instead the reverse happens. The primary feathers show from the outside and may even be twisted. Angel wing is slang for slipped wing in chickens. Actual Angel wing is found in water fowl.
Twisted feather is when a feather is in the slipped wing position but is turned upside down so that you are seeing the bottom side of the feather.
All three of these conditions are considered disqualifications in the show ring. When assessing for faults in your bird make sure that you are not looking at it if it is heading into its annual molt. The best age to be checking is the thirty week mark. By this point the bird will be mature enough and is not usually going through a molt. You can begin to look at wings earlier at three to four months as most birds have fully feathered out by then to start getting an idea of what you want to save for poultry showing.
An APA standard is a valuable book to own. It gives you complete descriptions of what is correct for all breeds of chickens when you are showing. It also will let you know what is a disqualification or a fault. There is also the Bantam Standard which is also quite good. Silkies are classified as bantams.
You should try and breed your best to your best. These wing defects are a recessive trait and can be passed down. Choose wisely and create breeding pens with your best hens and rooster. A separate pen from the rest of your birds allows you plenty of room for your breeding program. This article on “Selective Silkie Breeding” will give you some ideas on how to set a program up.
For tips and tricks for raising outstanding silkies check out our Chicken Learning Center at VJPPoultry.com . VJP Poultry is an NPIP and state inspected hatchery located 30 miles north of St. Paul. We hatch out silkies all year long so we always have stock available. Like us on Facebook to get weekly updates on what we currently have for sale.
Victoria J. Peterson


How to Effectively Control Chicken Dust
 Chicken dust can drive you crazy. It is that fine white powder that works its way into every crevice and surface it can find. If you keep brooder chicks in your house, you will find chicken dust all over your home. Your outdoor coops can be very dusty as well to the point of making you gag every time you enter .the front door.
Chicken dust and poultry dust are different things. Chicken dust is a mixture of chicken feed, bedding material, bird droppings and feathers and dander from a chicken. Poultry dust is a chemical powder that you buy and use in your coop and on your bird to prevent mites and lice. We will be discussing chicken dust in this article.
There are four main things that can cause chicken dust. The first is made by chickens themselves and it is the number one cause of the dust. This is chicken dander. Dander is microscopic flakes of dried dead and shed skin. It can also come from the shafts of their feathers. Because chicks grow quickly, their skin cells are constantly turning over and shed off of their bodies. If your chicks are less than 18 weeks old they are constantly molting and growing feathers. The cuticle that sheathes the pinfeathers as they emerge, break off and contribute to the dust. Any age chicken that is going through a molt is creating more chicken dust than they usually would.
The second creator of chicken dust is chicken feed. If you are using crumbles such as chick starter, the fines (very fine, ground up dust from feed) are seen in your dish and at the bottom of your bag when you shake it out. As the chicks eat the food, they break it up into small pieces which fall into the feeding dish and create dust. Using a pellet form of food for adult birds will help cut down on the dust from the feed. Moving feeders outside will keep the dust from accumulating in the coop.
A third dust creator is is dry chicken poo. As it becomes hard and dry it can start to break down and become dust. Birds walking on it can help to make smaller pieces which leads to dust. I try and scoop up poo from outside in the run and inside the coop whenever I see chunks of it. I like the Activarmr gloves for this and all chicken jobs. They are flexible for picking things up and the bottoms are waterproof. Picking up poo keeps things looking cleaner and gets rid potential dust.
The last dust maker is from bedding. Pine shavings can be very dusty if you are buying the small flakes. Small flakes can be very powdery and very saw dust lik. Try to buy large flakes or a dust free bedding. Some bedding becomes dusty as it decomposes such as pine needles, straw and hay.

Dust in the house is a real nuisance. One way to prevent it is to keep your brooder in the garage and clean the brooder regularly. Incubators inside the home attract a lot of dust due to hatching. Besides regular cleaning after use, us an air hose to blow out dust around the fan to keep the incubator in good working order. I use a feather duster to dust everywhere dust has accumulated inside on flat surfaces such as heat lamps hoods. Other dusters such as microfiber dusters are great for those hard to get at spots.
I have a Neato robotic vacuum which I just love. Neato vacuums my entire house everyday. He helps me to be a better housekeeper by keeping extra things off of the floor so that he has more room to vacuum. This has led me to removing unneeded things off of tables and shelves so that I am able to dust faster and easier.
One other thing I have in the house is an air purifier. We keep ours in the room where we do incubation and hatching. I keep the door to this room closed to keep the dust centralized.
If you have been out to our place, you know that we have our chick room off the garage. This winter we installed an air exchange with filter. It is filtering and exhausting air to the outside of the house. This also helps to reduce the humidity created by all of those little chicks breathing and reduces odor. The chicken dust is trapped by the filter.
In the outdoor coops we always leave every window and door open all year round so that the dust can find its way outside. We installed turbine ventilators in the roof to draw air out and cool things down. Fans in the windows also blows unwanted dust out.
When I begin to clean the coops outside, I first remove all of the old bedding and empty it out. Then you can use a shop vac or a leaf blower to remove accumulated dust on the walls and ceiling. Make sure that the windows and doors are wide open so that the dust can be blown out. Wait ten minutes so that the dust in the air has settled and then wipe everything down with a wet cloth using a sanitizer or broad – spectrum disinfectant or a coop cleaner. For more information about cleaning a chicken coop check out this blog.
Always wear protective masks and eye wear when cleaning the chicken coop. There is such a thing as occupational asthma for people who work in the poultry industry. Always protect your airways with disposable face masks. You should also wear safety glasses to keep the dust out of your eyes. Your health is important.
For tips and tricks for raising outstanding silkies check out our Chicken Learning Center at VJPPoultry.com . VJP Poultry is an NPIP and state inspected hatchery located 30 miles north of St. Paul. We hatch out silkies all year long so we always have stock available. Like us on Facebook to get weekly updates on what we currently have for sale.
Victoria J. Peterson

